Drying out ABS filament is not an easy process. It can be done, but it takes a lot of time and patience. If you are looking for an easier way to do this, then you might want to check out our blog post on how to dry ABS filament using warm air only.
Related:
- Top 7 Best Dual Extruder 3d Printer Under $500
- Top 7 Best Filament For Lithophanes
- 7 Best Hairspray For 3d Printing
- Top 7 Best Direct Drive Extruder
- Top 7 Best Resin For 3d Printer
How to dry out abs filament?
I was cleaning out ABS prints that have been sitting for a couple of months in my filament box, most of them are still good but there are some very damp ones. I’ve tried drying the filament by putting it in an oven at 60°C with no luck.
The same joints seem to grow small bubbles after printing like they’re not dried completely and there is still some moisture left inside because you can see little droplets on the surface when shining light through; also because the parts do not stick together properly when put into an oven (i did experiments).
This question came up often enough that we started thinking about a solution: “what if we could make water evaporate from ABS and PLA while keeping it under vacuum?
That way, we could dry out even the most humid prints and reuse the ABS/PLA!”
So we decided to try it ourselves. Here is how you can do it too:
You’ll need a big bowl, a smaller bowl that fits into the first one plus a few other pieces of equipment. Oh yeah, and an aquarium pump + a vacuum cleaner with a hose – or another form of the vacuum system.

How To Dry Out Abs Filament?
Here’s our story:
Let’s say you have 2 objects printed from ABS or PLA filament laying around for some days already. We want to get those two objects as dry as possible so they can be reused! But let’s not just put them in an oven at 60°C because this will change their shape and is a terrible solution, right?
We went through the same thing before starting this experiment. When drying ABS with an oven you’ll always get some warping and the print will shrink a bit. This part of the story ends here but we’re going to continue with our test!-
Put one of the objects in a bowl that’s larger than it – preferably glass or another transparent material. Make sure there’s no contact between them because these parts might stick together from humidity which destroys your aim for now:-
Take out any filament stuck in your nozzle when printing/trimming etc…
Fill the big bowl with water until there’s enough so that it completely covers what you put inside before – add more if needed.
There is a lot of humidity in the air if you live in a warmer climate so we need to reduce the amount of water vapor inside by putting this bowl with our object inside it into an oven at 70°C for 45 minutes:-
Here’s why: This hot air holds less water than cold air and all we’re trying to do here is evaporate as much water as possible from our two ABS objects! The hot air will also lead to some shrinkage and that’s clearly visible when looking at one of our prints: –
IMPORTANT:
If you wait too long between steps 4 and 5, you might see your filament developing bubbles again. That’s because moisture is moving around inside those parts already; you need to be fast and keep it under vacuum! 🙂
Let the objects cool down in the big bowl; you’ll notice there’s less water vapor near them now because of the oven heating up.
Time for step 5: Put everything into a smaller bowl and put that one into your vacuum chamber/chamber whatever it is called. This time we’re going to reduce the pressure inside this space with our aquarium pump – we want as much vacuum as possible without creating any bubbles or holes in our ABS object(s). You can see what we mean by looking at these small wounds: –
Do not use too much power when operating your vacuum cleaner because you might suck up water which would contaminate your filament! Let the objects sit in the vacuum for an hour and see if there’s still any water on their surfaces. If yes, let them stay in the chamber for longer; if not, you can go to step 7 now.
Gently pour out all the evaporated water from your bowl and put everything back into your oven at 70°C again – make sure there’s no contact between your ABS object(s) and anything else (e.g.: Alu foil).
Let these cool down again while being surrounded by hot air which holds less humidity than cold air. After that we’re going to repeat step 5 once more!

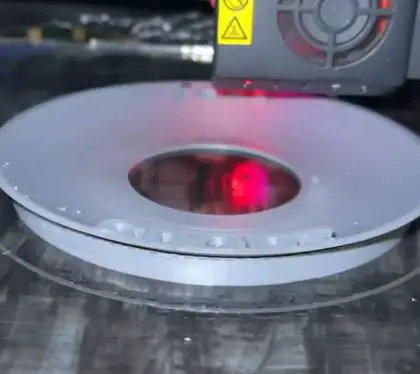
How To Dry Out Abs Filament? (cre: matterhackers)
Does abs filament absorb water?
We’ve done some tests with abs filament that was exposed to humidity/water.
As far as we know ABS itself does not absorb water, but the lacquer layer on the outside of most 3D printer filament is hydrophobic (repels water).
As you can see in the video below, after hanging our filament pieces in a room overnight they absorb quite a bit of water. But once dry again it’s not an issue anymore. So any hygroscopicity will be temporary and easily reversible by letting them dry out again.
It feels like the water will quickly diffuse into the material through any cracks that might be present. A humid environment for printing would need very clean filament or maybe even sealed packages to prevent this from happening.
At the moment we have no specific recommendations on how to deal with this. It is important for us as a company to print reliably, but our customers also have different concerns and preferences in mind when they choose a filament. So feel free to share your opinion with us by contacting us or leaving a comment!
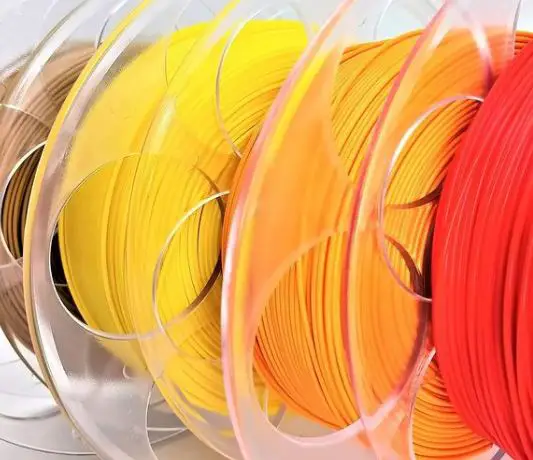
How to store abs filament?
Abs is tough plastic. In order to prevent the material from bending during transport and storage, it’s advisable to store it in a tightly sealed bag with some pieces of carton or polystyrene foam that will keep them apart from each other. Avoid stacking them too closely as this also causes the ABS filament to bend at the place where they meet.
If you plan on using your abs filament in a heated build chamber (200°C +), then there is no need to worry about warping since this is usually not an issue with high-temperature resistant plastics. You can safely use abs even in a professional-grade 3d printer, such as Lulzbot TAZ 4 . However if you’re going to leave your printer at home and the filament will be stored in a cold place, you should still try to keep it as cool as possible and avoid bending.
HDPE is more flexible than ABS so you can store it on a spool or in a bag without any protective material. Never leave it exposed to sunlight for prolonged periods of time though, since this will affect the color.
For PLA filament, I recommend using either of these two storage methods:
1) Keep it on its original spool with protective cartridges (e.g. PVA glue stick). This way you can reuse the spool once finished (PLA filament does not adhere to itself like ABS). Or simply roll up the PLA inside its original package and use an elastic band to secure it.
2) Cut the filament into shorter pieces and keep them in a tightly sealed container with some silica gel packets.

How To Dry Out Abs Filament? (cre: all3dp)
How to make abs filament stick?
I read somewhere that ABS sticks better to blue tape or Kapton tape, and is not easy to hold onto the build platform. Is there any tricks I can do before starting a print?
ABS is the best filament for 3D printing because it’s one of the easiest to work with. It melts at a slightly lower temperature than PLA or PETG, is very strong once cooled, and doesn’t warp.
Unfortunately, it smells while it’s being heated up and melted which some users object to. Where possible we tend to use PLA or PETG in place of ABS but some prints just require the extra strength only offered by ABS so we usually have a roll on hand and deal with the smell.
One of the problems you can run into with ABS prints is that it’s a little bit more difficult to print successfully because it doesn’t stick very readily to various 3D printing surfaces. Currently, we have been using Kapton tape which has seemed to work well, but I am also aware of a few other options people sometimes use for this specific problem.
A common suggestion would be blue painter’s tape as some users said that ABS had major difficulty sticking to it and tended to warp quite badly from time to time.
Another idea thrown around is that ABS sticks better on the glass as opposed to Kapton or blue painter’s tape – I had personally not tried this before but thought perhaps somebody else might know if this is reliable or not. As a last resort, ABS also sticks okay to bare metal if heated up enough, but this can be a little bit dangerous as it does tend to burn quite easily.
If you are having too much trouble with your prints warping or staying attached please do not hesitate to contact our support staff via live chat on the front page of our website. We will be more than happy to help you out any way we can and make sure that your 3D printing experience is as positive as possible!

How To Dry Out Abs Filament? (cre: reddit)
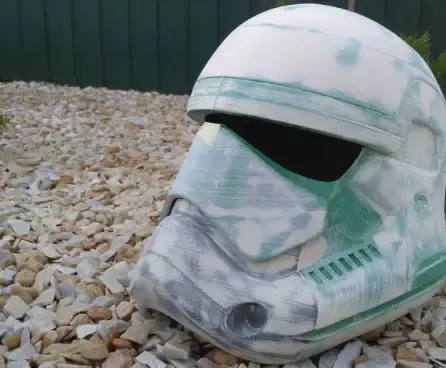
How to paint abs 3d print?
The moment when the printer’s job finishes and you take in your hands your freshly printed model it is worth being ready for some extra work in order to make your result look even better! And, actually, one of these works is 3d print finishing.
It can vary from removing supports or rafts to sanding and polishing. Today we will talk about this last thing – 3d print polishing. It is not so difficult as it may seem at first glance but there are certain tricks that we would like to share with you. So, let’s get started 🙂
3d print before and after: what you should know:
Most of the 3D prints need a little more attention than just the completed printing process and removal of support or raft. Some of the prints (like this one) require sanding and polishing in order to make geometry more smooth and high-gloss look.
But why is it happening? The thing is that ABS material has a rough structure which naturally creates this effect.
3d print sanding: basic rules:
So now you know what you should do but how exactly should be done 3d print sanding? There are general tips that can help you not to turn your desk into a messy place after finishing polishing work :).
Let’s go! 1) Use masking tape for protection – It will help you to protect other parts from scratch, dust, etc. 2) Attach paper sheets around the model with spray adhesive – this will help you to avoid scratches. Of course, not necessary but it’s all up to you 🙂
3d print polishing: the best technique:
And now for something different than just “tips and tricks”. We would like to share with you our experience in 3D printing removing supports or rafts.
You know that it is a very important step when finishing the model because it has a huge impact on geometry quality. And here is what we do in order to make this job more effective!
Take some fine sandpaper (we used 240-320 grit paper), adhesive or rubber base, putty scraper or knife, and prepare workspace close to your printer where you are going to use the finished part after removing support.
Clean apart from dust and place it on an adhesive/rubber base. Now, take a putty scraper or a knife and start removing support! With this method, you not only save your time but also have full control over the process – do whatever you want with the geometry without worrying that something will break 🙂
Conclusion
There are many ways to dry out your ABS filament. One of the most common methods is by using a vacuum cleaner at high speed for 30 seconds at a time with breaks in between.
This can be repeated until the water has been removed from the plastic filament and it’s no longer wet or dripping.
Another method is placing it near an open window, where the air will naturally evaporate any moisture while still keeping it cool enough not to warp or melt during the drying process. A third option would be heating up some sort of material that emits heat like an oven (or even just hot plates) then letting them rest inside for about 15 minutes before turning off again.
Further Reading:
- Top 7 Best 3d Printer For Board Games
- Top 7 Best Creality 3d Printers
- 7 Best Filaments For Ender 3
- Top 7 Best 3d Printer For Nylon
- Top 7 Best 3D Printer For Cosplay Armor
Tags: #Petg #Tpu #Abs #Supports #Panels #Pause #Kidney #Lower #Speed #Creep #Quality #Adhesion #Monoprice #Filament #Firmware #Bed