Can You 3d Print Silicone Molds? Silicone molds are not just for crafts. They can be used in the culinary arts for shaping food, creating prototypes and models of objects, or even as a protective covering for fragile items.
If you want to start experimenting with this versatile material, you may need some help creating your first mold. Luckily 3D printing has made it possible to print silicone molds!
This blog post will discuss the benefits of using 3D printers over other methods when making silicone molds and provide tips on how to use them effectively.
We’ll also go into detail about what materials work best with each printer type so that you know which one is best suited for your project!
Related:
- Top 7 Best Dual Extruder 3d Printer Under $500
- Top 7 Best Filament For Lithophanes
- 7 Best Hairspray For 3d Printing
- Top 7 Best Direct Drive Extruder
- Top 7 Best Resin For 3d Printer
Can you 3d print silicone mold?
Yes, you can 3D print silicone molds. 3d printing is a complicated process that uses 3D models from your computer to print items using a variety of materials. Silicone molds, though, are typically made by hand and not through a machine. There is a way for you to make silicone molds with the help of a 3D printer.
In order to make a silicone mold, you will need the following:
- -3D model of your object (you can find free 3D files all over the internet)
- -3D printer that uses ABS filament (or another similar filament that melts at a lower temperature) or sandstone material
- -ABS or sandstone material for the 3D printer
- -A release agent (usually vaseline or a homemade release cream)
- -Powder silicone resin kit
- – you will need at least 2 parts out of A and B, adding more parts will make your silicone thicker.
The kit contains a kicker that makes the mixture expand as it cures. This is highly recommended if you are using sandstone material. If not, then you can simply use a thick silicone sealant from the hardware store instead.
1. Take one part of powder silicone from kit A and pour it into dish A to mix thoroughly with the hardener
2. Then take another part of powder silicone from kit B and pour it into dish B to mix thoroughly with the other hardener
3. Pour part A into part B and mix thoroughly with a spoon
4. Mix continuously for at least 3 minutes (some recommend more, especially if using the sandstone material)
5. Once you are done mixing, put your 3D-printed object on top of the molding powder to form it into the shape of your object
6. Now pour the rest of the mixture over your 3D-printed object and sift some concrete powder on top to fill in unwanted spaces between your model and the molding powder
7. Let this sit for an hour or two until dry enough that you can remove it from your printed model without breaking anything apart. Be careful! The drying time varies depending on the amount of mix you used and what kind of object you were trying to mold
8. After it has dried, carefully remove the small plastic support you placed there while it was drying (or while it was printing)
9. Place your hand on top of your 3D-printed object and pour the rest of the silicone material over it to make sure that no particles are left behind in any cracks or crevices between your 3D print and the molding powder. If using sandstone, this is highly recommended since resin doesn’t attach to sandstone very well when curing
10. Now that your silicone mold is complete, let it fully cure for at least 12 hours before use!
*It should be noted that you can leave your 3D-printed object in the silicone mold for up to two days before it will fully dry, especially if your model is hollow. It’s best to keep it there until completely set, though. If you are having trouble removing your 3D-printed object from the silicone mold without breaking or tearing anything apart, then this means that you might need a stronger release agent next time.
*Use this method at your own risk! After all, working with molten materials is dangerous and should only be done by responsible adults! If using sandstone material instead of ABS filament, then it’s highly recommended that you mix more parts into the mixture since sandstone takes much longer to cure than resin does.

Can You 3d Print Silicone Molds?
3D printing molds for casting
Today, we’re going to talk about a method that can be used when 3D printing objects in order to produce master copies.
This is the step before mass production when you need quantities of fewer than 100 units. Once you’ve made your master copy, called a “stereolithography model,” or STL file, you must make a mold from which many copies can be cast. In this article, we’ll tell you all about it!
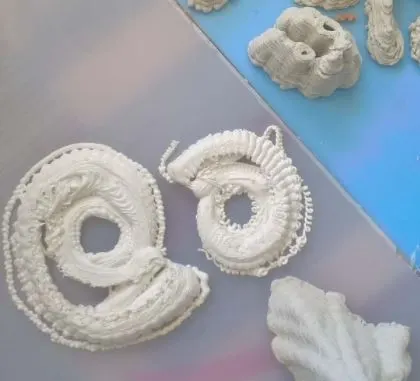
1. How do they make molds? Making molds is one of the oldest methods of creating several identical items.
Before starting on the actual method itself – building the mold around your object and then extracting that object within to fill with another material – we should look at the materials that are used to make molds.
There are many molding compounds, each one has its own advantages and disadvantages. To begin with, there are ceramic materials that have excellent dimensional stability over time, however, they are quite brittle so they must be cast in steel molds.
Another compound is called “RTV silicone,” it’s a great performer but the downside here is that RTV silicone can’t resist high temperatures or pressures, so it needs to be made compatible by adding some harder materials into the mix.
Then again there is also plaster of Paris which is cheap yet not very accurate, being suitable only for simple castings without any particularly thin or complicated. You would need to make a steel mold in order to extract the plaster casting, which is not an easy job.


Can You 3d Print Silicone Molds?
What materials are suitable for making molds? (liquid silicone)
The required material will depend on your 3D printer – what kind of filament it uses and how well it works with different materials.
Some printers print at sub-zero temperatures others at high temperatures, some work only with PLA while others can use ABS as well.
So depending on that you should choose either Plaster (PLA) or RTV (ABS). Let’s take a closer look at each type:
PLA contains water, so after a long period of time, there will be a lot of moist, which has obvious disadvantages when combined with the fact that plaster is highly hydrophilic. In other words, water and plaster do not mix well together.
ABS is a good material for making molds from as it doesn’t shrink on cooling which allows for more accurate casting.
It has a low coefficient of thermal expansion so it would be suitable for producing parts with complex shapes. The problem here is that ABS sticks to almost everything except for itself, so you will have quite some trouble washing the mold off from the object being cast.
ABS also emits styrene gas during printing, which can cause dizziness and headaches. Our choice: RTV (ABS)
Which 3D printer is best suited for casting and mold model? Prusa or Makerbot
Since we’ve decided to print our models in ABS, we need to find a 3D printer that’s good for the job. We’ve come up with two solutions:
The first one is to use an FDM-style printer that has active cooling. These printers have metallic hotends so the temperature won’t be much of a problem here. Our second solution is to buy or build an enclosure around your printer. This way you will keep all hot air inside allowing for thicker prints and lower layers, two things that are very important when printing RTV molds. 2. Building the mold
Now that we are familiar with the materials used to produce molds, let’s see how it works in practice starting from choosing our model (the part we want to make a mold of).
There are some things you should consider before choosing a part, the most important being the wall thickness. Depending on your printer accuracy, it’s recommended to have at least 1mm of walls if you want to get accurate casts.
Let’s take our example file which is in AI format so we can open it in Illustrator and use its “Outline” function; this way you will be able to see the thickness of each shell. It would also be good if that model has high enough density, that way when printing it with ABS there won’t be much warping happening.
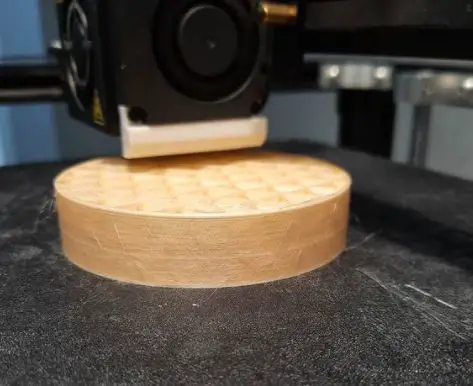
The next thing after your design is ready is to slice it into layers using standard slicing software. Our object was sliced by Slic3r PE with 0.3mm height and 2 perimeters, which is actually too little for ABS so we need to fix it.
To get the model sliced at 0.45mm layer height with 3 perimeters you can use either Slic3r PE or KISSlicer. It would be even better if you could set infill as well, making it 40%-50% of the original size. Now print using ABS filament and don’t forget to put it into your enclosure – remember what we’ve said about all those fumes? 🙂 For best results fasten your object onto the bed with some tape as this way it will be much easier removing the printed part from the bed without wasting time or filament on that. We waited until our print was done then used a pair of pliers to remove it from the bed.
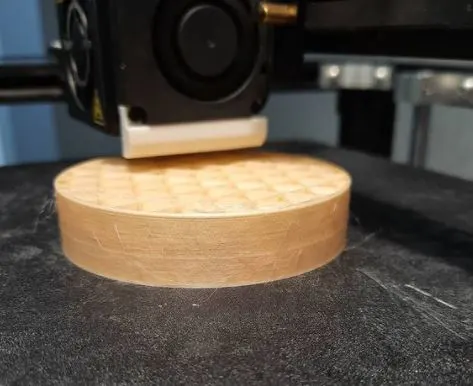
3D printed model with walls too thin, resulting in warped (noticeable on the “thick part” of the toy’s ear) or incomplete print (we had some issues when printing the two toy legs at once). We fixed this by increasing layer height and infill to 0.45mm and 40-50% respectively.
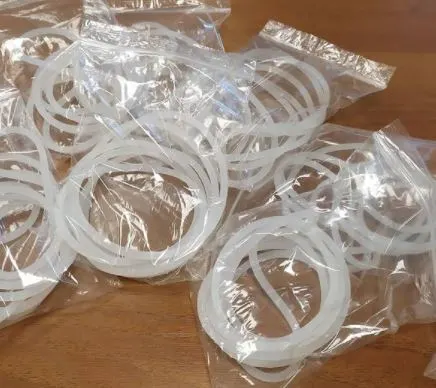
Now that we have our 3D printed ABS mold, we need a suitable material for making an RTV mold from it. There are many molds made from different materials available so you can choose whatever one suits your needs best. For what we did, we chose a silicone rubber called Mold Max 30. This material can produce firm and accurate molds with minimal shrinkage, is flexible and has low gas permeability.
An RTV mold made of silicone rubber (Mold Max 30) on the left with the original object (on the right) covered by it. Notice how closely they fit. You can also notice that there was no shrinkage during curing which means our mold turned out perfect!
Can You 3d Print Silicone Molds?
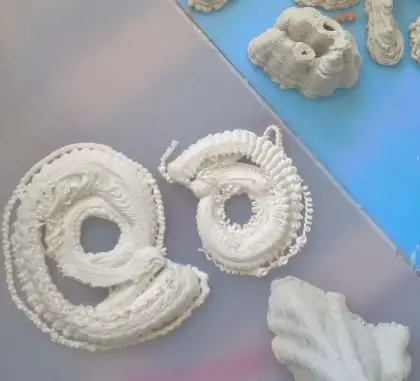
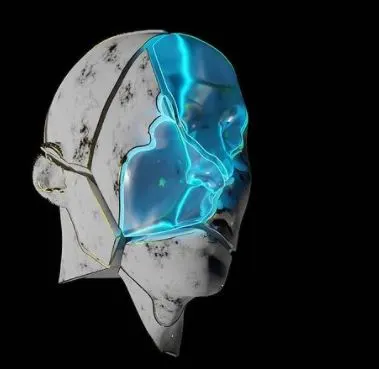
3D print negative molecule of strontium titanate
A lot of people are looking for ways to carry out 3D printing this interesting material.
The reason is that the Strontium Titanate(STO) can be used in many fields, it has high dielectric constant()=300Kgf/m2), low loss tangent ()=0.0003). It has high stability up to 450°C, higher than other commercial ceramics with similar properties.
After several tries printing STO, I succeeded in getting a negative module which can then be printed into various forms or shapes according to need. This process was achieved after preparing the materials and following recommended procedures for preparing polymer resin before printing, also I tried various methods to kick start the polymerization of acrylate resin, And finally succeed in getting a perfect 3D print form.
Can you 3d print resin molds? (make silicone molds)
In this article, I will give you the answer, and the reasons why resin casting is a good idea over 3d printing using resins.
In both cases, I will make a reference to printers that I have experience with – simply because it’s easier for me to describe my experiences rather than spending several paragraphs describing how other printers work – also considering that most people reading this article aren’t going to own a Palette+.
If you do own a different printer or would like for me to discuss another printer please let me know in the comments below!
Ok so let’s get down to business: Can you 3d print molds? The short answer is no.
Now, what about resin casting? Again, no. But it seems as though there is a bit of confusion about this on DIY forums. So before I go on to discuss why, let me first clear up some things on what you can 3d print using resin, and the benefits it has overcasting.
3d printing molds vs. tools or printed objects?
First thing first – the difference between 3d printing an object which will be used for molding (in our case) and 3d printing objects that are commonly referred to as ‘tooling’. In short, tooling is simply a fancy word for an object that is printed in order to use when manufacturing another product.
An example would be a model car printed in ABS which is then used in the injection molding process when producing real cars from plastic pellets.
But that’s not what we’re doing here. We are using our printers to print parts of the mold itself, which will be used for casting other objects in resin.
An example would be printing a solid shell of a handle with integral hinges – or even just separate shells which then need to be glued together with some sort of adhesive into one piece.
In both cases, since our part would have moving parts, it is impossible to cast it as-is and still expect the finished product to look good and work properly – so we need to use a different approach – known as a separator.

Can You 3d Print Silicone Molds? (cre: sculpteo)
Separators: A necessary evil?
Ok so now let’s move on to something everyone is familiar with – separators.
A separator is a thin wall or sheet of material placed between two solid parts, glued together with some adhesive. A good example of this would be a nut and a bolt.
By gluing them together using an adhesive we create a separate entity – the nut and a bolt are no longer one piece – but rather two pieces that have been ‘joined’ into new object by us. This process is called molding, which is also the term used when creating molds for casting new parts from resin.
It means that it’s now possible (and relatively easy) to 3d print very complex objects that are impossible to create using traditional techniques. An example would be a model car with moving parts printed in metal or resin, which can then be used for molding new parts out of plastic.
Even better – you could cast the wheels in rubber and make it an all-metal car! The possibilities are virtually endless, as long as you have the right know-how and tools.
Now let’s move on to why resins aren’t so great for 3d printing molds…
1)If you do manage to print your object without any warping or other problems, chances are it will still not be usable as a mold.
Why? It is impossible to print the object without any undercuts or overhangs which are located on that part of the model that will be inside the finished piece (for example nuts, that need to be glued into their slots).
Without these areas your finished product would either fall apart or not fit together at all.
2)You cannot simply pour the resin into an open shell and hope for the best – you need to figure out how the whole thing is going to come together.
You can’t just cut off your separators because chances are they won’t break cleanly along their surface, which will leave sharp edges on both sides of the newly created hole.
Solution? Either glue them back in place after casting with some adhesive or use supports.
Supports are structures that are embedded into the 3d print before printing begins and they serve as guidelines for resin to build around, but also act as support structures which will be used to suspend your molds in liquid after printing is done. You can create these by hand (or with custom scripts) – but if you’re like me and don’t like wasting time on tedious tasks, there is a much faster way of handling this situation!
3)Worst case scenario… you managed to avoid all the problems mentioned above. Congratulations or condolences?
I’m not sure how you feel about it – but now imagine yourself staring at one of the most difficult pieces of software on planet Earth (well maybe second most difficult after Solidworks)… Simplify 3d. At least, that’s how it seems to me and my three Solidworks licenses (yes, I needed THREE of them to figure out what the hell is going on in this program).

Can You 3d Print Silicone Molds? (cre: matterhackers)
Now let’s take a look at the simplified view of all the parts that need to be joined together:
As you can see Simplfy3d failed to generate supports for one model – maybe because they were too thin? After looking through their help resources, I figured out why simple shells weren’t merged into one part after printing. It was because ‘shell type’ wasn’t set to ‘infill’. No idea why… but now it’s time for some much easier approach
The quickest solution I’ve found is using Slic3r & Meshmixer. Both of these programs are included with a most recent version of Cura
Slic3r is mainly used for generating g-code that will be used by your printer while meshmixer serves for post-processing STL files… so technically speaking it’s not a part of 3d printing process itself. But don’t worry! It’s still very useful when doing more complex molds development. To see how it works on an example, please keep reading!
So what you need to do at first is create the shell in meshmixer that has all undercuts removed
Now, let’s open the slicer and configure our object to be printed as a shell with .4mm thickness and 30% infill. After you exported G-Code, go ahead and open it in Meshmixer:
What you need now is to manually combine all those separated STLs into one piece. To do that you simply drag and drop STLs into one file. As soon as all the models are combined, just use the ‘Combine’ tool and delete any result where two shells intersect (the thin lines before hitting the model’s surface). After this is done – we can now slice it!
You might notice that I’ve set up the infill to be not 100% but instead 95%. This is because we want some extra strength in those supports we’re about to create. Now go ahead and hit print… (and don’t forget to check if your printer didn’t mess up the model’s scaling by hitting CTRL-A)
When printing finishes, open it in meshmixer and prepare for some super easy generation: Just choose ‘Create New Print’ from meshmixer’s toolbar and you will notice it automatically fills some parameters for new print – including the dimensions, infill type & percentage. All you have to do is change shell thickness from .4mm to 0.15mm, turn off ‘Supports’, and hit “Apply”
Now just a quick little reminder that supports themselves will be printed as a shell too – so don’t forget to set up your slicer with proper settings again! And if you’re not happy with the orientation of those support structures on the model, just select all of them at once by CTRL-clicking on part of them and rotating as needed
can you 3d print on paper?
The short answer is “yes”.
The big downside to 3d printing on paper is that the resulting models are fragile and can’t be post-processed like normal ABS or PLA prints can.
If you’re looking for something useful, stick with injection molding. But if you’re interested in learning more about the process, this video does a good job of walking through it.
Conclusion
3D printing silicone molds is a cost-effective way to produce high-quality prototypes that are durable and flexible. The molding process requires computer-aided design (CAD) software, which can be time-consuming for some designers who aren’t familiar with the software’s features or functions. However, if you’re looking for an affordable option to scale up your production volume without breaking the bank on plastic injection molding tools, there may not be a better solution than silicone 3d printing!
Further Reading:
- Top 7 Best 3d Printer For Board Games
- Top 7 Best Creality 3d Printers
- 7 Best Filaments For Ender 3
- Top 7 Best 3d Printer For Nylon
- Top 7 Best 3D Printer For Cosplay Armor
Tags: one can make several copies of one product, is definitely a reality now, could multipart silicone molds, one-part silicone molds box, remove form styles, style display years, clay mold box model, two-part silicone mold industries, molds one-part silicone modeling, comment download step, printed molds ago