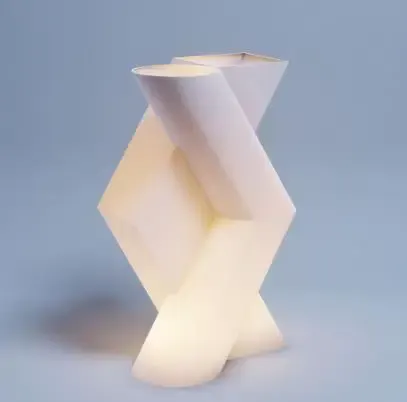
What Causes Layer Shift In 3d Printing? Layer shift is a term used to describe the misalignment of layers in 3D printing.
It can be caused by many factors from improper slicing settings, incorrect bed leveling, and poor quality filament.
We will discuss some tips on how to avoid layer shift and what you can do if it does happen.
Related:
- Top 7 Best Dual Extruder 3d Printer Under $500
- Top 7 Best Filament For Lithophanes
- 7 Best Hairspray For 3d Printing
- Top 7 Best Direct Drive Extruder
- Top 7 Best Resin For 3d Printer
What causes layer shift in 3d print?
If the nozzle collides with the part being printed, it can cause problems. If the printer is printing something that has small features, it could come loose. When printing a warped first layer, it can easily get in the way of the nozzle. In most cases, a layer shift looks really bad on the exterior of a print, but it can also cause problems with internal layers as well.
A layer shift is when the printer fails to complete a single layer and moves onto the next one before starting back at the top of your model. If you have a first-layer problem where your extruder starts printing in the wrong place, it can cause a layer shift.
A printer should always start each new layer at the exact same spot on your print bed.
If you don’t get this right and begin to lose that reference point, you’ll likely have a problem with warping. With that being said, one of the most common reasons for layer shift is when the nozzle hits a part of your print that is still solidifying.
If you see one side of your print completed and having shifted over, it’s likely due to this problem.
While you can rebuild these areas to be stronger, they will typically always have a weak point where the shifting took place. This isn’t always true if you use support material or brims in certain parts around your model; but in most cases, there’s at least some level of deviation in their strength over time because the initial bonding was not perfect.

As you can imagine, this issue may occur when printing with flexible filament (such as NinjaFlex)—not only because it shrinks when cooling—but also due to its ability to bend and give.
When the nozzle collides with parts of the print, it can cause a layer shift if you’re not lucky in that particular spot. This is another reason why we recommend having your bed at a level that’s perfectly parallel to the print head.
This process has been known to affect both FDM and PolyJet machines; however, I’ve found that with PolyJet, these issues tend to be less frequent (but maybe only due to the fact that I’m using their materials more).
You can easily make up for this problem by making an adjustment in your slicer settings when generating support material (“Rafts” in Cura) or when adding external brims on models with overhangs.
If you have your bed at the proper level relative to the nozzle, you can compensate by moving your model down a bit on the Z-axis so it’s not directly underneath where the head is going to be.
This way, if there are any imperfections or straggler strands of filament that are being printed, they will have time to cool before they are hit again by the nozzle.
Sometimes layer shift occurs when printing parts with very small details—such as one with overhangs that require support material. If you notice this happening only in certain areas, you may need to adjust your support parameters.
For example, if they are too dense under some sections you’ll get shifted layers; but if they aren’t dense enough in other spots, they won’t print in time before being hit by the nozzle.
With high-temperature materials, it’s also known to happen when printing models with very large base layers that are taking their sweet time to solidify, simply because the nozzle cannot stay in one place for too long.
This is why I would avoid this process with TPU materials if you can help it, or at least not use a temperature above 235°C.

What Causes Layer Shift In 3d Printing?
How to fix Layer Shifting in 3d printing? (Experiencing layer shifting)
Layer shifting in 3d printing is a common problem, especially with ABS prints (printed models)
One reason for this is that the lower layers are not sticking to the layer beneath it, which causes there to be space between each layer being printed on top of each other. This is why it “shifts”, instead of being stuck together, they have shifted apart from one another.
It also makes the print more fragile and likely to break apart while removing it from your build plate after printing or while handling it…
Another reason could be an uneven heated bed surface, which means that your first layer is not getting adhered properly, usually, this isn’t very visible until you have at least 2 or 3 layers stacked up.
Another problem could be too much plastic, either your hotend is clogged and needs to be replaced, or it could also be that there’s too much plastic in the hotend and it spills over while printing.
Sometimes people see some stringing and they think that this is the reason for the shifting layers.
That might appear on large flat surfaces, but if you already try to print something small, like a keychain, then you will get layer shifting even without stringing because of all of the above factors.
All these problems can usually be fixed by tweaking 3d printer itself, so I’ll go through all of them – fast printing speed

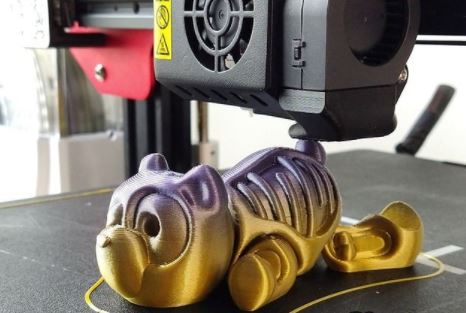
What Causes Layer Shift In 3d Printing?
How to check for unevenly heated bed? – Layer shifting mid-print
First, we need to know what our reference temperature is. To do this we’ll need to go through our software (Cura, Simplify3D, Slic3r).
You can choose the thickness of your heated bed in your slicer. I’m using Cura, so my height is set at 3mm. Now I’m printing a 4x4cm object without any raft or support and it has already printed 10 layers (it should be printing only 5 layers but since I removed support material there’s some extra plastic oozing out that you don’t want to print). So, measure the height of your printed part.
The height of my printed part was set to 7.5mm after removing supports. If you take the difference between the reference value for this hotend and what it actually measures then you can calculate the height of your heated bed. The height of my heated bed is actually 1mm, which is too low for ABS. You can go to this website and see what height you need to set your heated bed in order to get proper adhesion when printing ABS.
You should tweak it until you don’t have any strings or edges lifting up, but mostly fix the problem related to shifting layers (like not sticking properly). I found out that if it’s lower than 3mm then there’s no way I will be able to print ABS at all! But with higher values like 5-10mm it works great. So keep in mind that a higher number means more chance for warping, but also better adhesion when printing with ABS filament.
You should also check if your nozzle is properly leveled because even a small deviation from the perfect leveling can cause problems with adhesion.
Thingiverse user Emmett created a guide on how to properly level a nozzle and it should solve some problems, at least for initial layers printing.
Keep in mind that not all printers are built based on official documentation so if you have some 3d printer where XY axis is shifted by 1mm you probably don’t need to change anything unless ABS is printing outside of its build area… It’s always better to just check what is corresponds to your model dimensions, but I found out that generally FDM printers are built pretty similarly so this guide will most likely work for many other models as well.
Most common problems are usually related to the hotend, but you can also have some issues with filament itself.
What Causes Layer Shift In 3d Printing? (cre: simplify3d)
How to prevent stringing?
Most of the people who find solutions for their problems with plastic stringing are using PETg or PLA because they don’t need any special settings.
You just go into your slicer and reduce the number of perimeters by lowering it from 3 to 2 or lower than that, so all of the curly strands will disappear.
But ABS needs more tweaking. So the first thing you might want to do is increase printing temperature up until where you don’t see strings anymore (keep in mind that higher temperatures mean more warping though).
But since I’m not setting my temperature manually I’ll show you what settings you can use for both Cura and Slic3r (I’m using Cura 2.5 because it’s free):
In cura you need to switch from “Normal” mode into “Expert” mode, add your printer with changed settings in the add machine menu and then go under the expert tab, find where it says extruder and change temperature there. In slicer just change filament temperature but since my printer has a hotend fan I might have different results so results might vary depending on your machine configuration. My problem was that even with higher temperatures I had a lot of strings.
That is when I found out that people who have a very similar model recommended reducing speed down until around 30mm/s. Here is the guide on how to configure your slicer for good printing which also contains settings for the printer I have.
Increase fan speed!
My hotend already has a fan cooling it from the back, but this will probably not be able to cool down all of the heat coming from PLA. So make sure you add support material with a fan enabled or just upgrade your machine and do some research on various nozzles that are available out there. I found a lot of people using what they call volcano nozzle which basically sucks up ABS filament in order to prevent stringing and dripping. There is a nice manual on how to properly create your own, but if you don’t want to spend so much time configuring things then buying one should be enough.

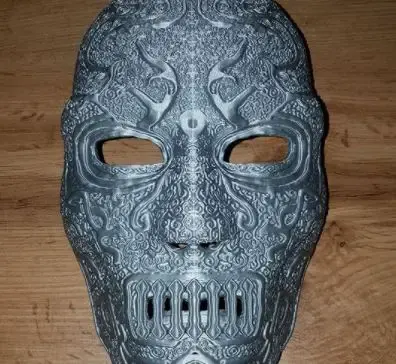
What Causes Layer Shift In 3d Printing?
I hope that this guide will be of use for people who are having issues with printing ABS on their 3d printer. Since I joined the RepRap community I was always amazed how many different types of printers there are out there.
It’s hard to believe when you see all of these T-Slot Printers, Delta 3D printers, and even some really crazy-looking machines which have two or more printheads working in coordination in order to print something twice as fast…
But it seems like not too many people are aware that besides these big beasts there are also quite a lot of small self-assembled FDM printers available out there.
They might not look fancy but they cost between 89$ up to 299$ so they are definitely affordable and you get to learn how 3D Printer works while spending time assembling them.
I got my printer from banggood and while ordering different parts for assembly I realized that there is no one place where RepRap community shares everything people might need when building their own machines, so I decided to create this blog in order to help others who might be looking for some information or just inspiration to build something similar. Here are some of the things other people already made:
Heatbed with Borosilicate Glass Plate.
It’s a nice add-on since glass doesn’t warp making it easier for you to remove printed objects without damaging them. Also, borosilicate glass makes a smooth surface which is perfect if you don’t have a heated bed since ABS and PLA don’t stick that well to unheated bare glass.
With this heatbed you can print ABS without having any problems with warping.
One more thing that you might find useful is the Prusa i3 Builders wiki. It has a lot of nice information but it seems like there are not enough people around who would update the wiki so things get outdated rather quickly, Either way, it’s a great source of inspiration. There are also plenty of manuals available online which you can find on all RepRap websites.

What Causes Layer Shift In 3d Printing? (cre: prusa3d)
Now go out there and build yourself a nice printer!! 🙂
One more thing… If you don’t feel like going through all of this work then just send me an email and I will print you any 3D file for just 5$. Also have in mind that these prices are valid only for people from Europe, the USA, and Canada so if you’re from another country then just contact me with your location and I will let know how much it will cost to ship the object to your place.
For those who want to print something really big or detailed, I have also included different types of filament available at affordable prices. In order to get rid of price quote visit the wholesale page where you can choose as many types of filament as you like and get the combined price.
As I mentioned earlier I’m not getting anything out of this so if for any reason you don’t feel satisfied with anything that’s being offered here on this blog then just let me know and I will try to find a way to fix it.
Conclusion
Layer shift is an issue that can occur in 3D printing. This may be because of inaccurate settings for the printer, or due to something like a sudden change in temperature.
The bottom line is if you want your prints to come out looking good and accurate, it’s important to troubleshoot layer shifts before they happen so that you don’t have problems down the road with missing layers or other issues related to incorrect positioning on top of one another.
Further Reading:
- Top 7 Best 3d Printer For Board Games
- Top 7 Best Creality 3d Printers
- 7 Best Filaments For Ender 3
- Top 7 Best 3d Printer For Nylon
- Top 7 Best 3D Printer For Cosplay Armor
Tags: #Knife #Supplies #Resin #Bust #Pattern #FEP #Layer #Bed #Warping #Thermistor #Printer #Firearm #Bong
Tags: 3d print, shift, sign of incorrect belt tension and alignment or a poor printing configuration, to obstructions and abnormal movement of the print head caused by vibrations, two or more individual layers are misaligned with each other, due to mechanical or electrical issues with the printer, cause layer shifting, a printing issue, loose belts, layer misalignment, causing, layer shifting problem, steps maintenance tips, maintenance tips troubleshooting, layer shifting issue, fast printing speed, steps maintenance troubleshooting, troubleshooting layer shifting, layer shifting mid-print, experiencing layer shifting, motor, pulley, axes, read.