3D printing is a process that creates three-dimensional objects from computer-aided design (CAD) data. In this article, I will show you how to 3d print a knife.
It’s not difficult and can be done with household materials.
The only thing you need is a printer and the CAD file of the object you want to print out. For more information on how to 3d print a knife or any other type of object, read my blog post!
Related:
- Top 7 Best Dual Extruder 3d Printer Under $500
- Top 7 Best Filament For Lithophanes
- 7 Best Hairspray For 3d Printing
- Top 7 Best Direct Drive Extruder
- Top 7 Best Resin For 3d Printer
How to 3d print a knife?
Here are the steps on how you can make a printed knife using PLA or ABS material. I hope it is understandable. if not, feel free to contact me.
you need:
1) 3d printer – FDM type (Prusa i3 comes in mind)
2) filament – PLA or ABS recommended, PVA for water-soluble support material (i used PLA)
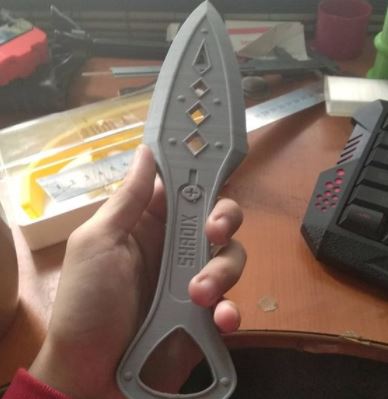
3) scale to check if the final knife fits your hand (mine was 30.5 cm)
4) time – it takes about 20h for me to finish all steps 🙂
5) printer setting as follows:
PLA material, 0.15mm layer height, 2 perimeters, and 25% infill for strength.
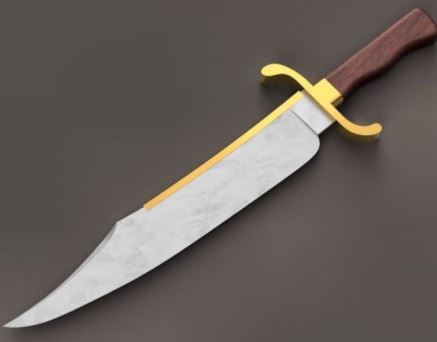
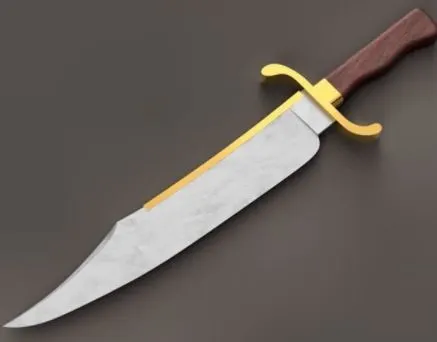
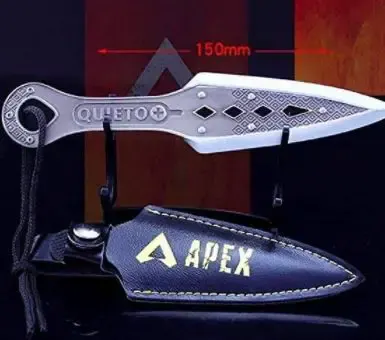
6) knife – I used this file from Thingiverse. I paid the author a visit and asked if he is fine with me sharing his work here on my blog. do not forget to give him some love back too 😀
7) support material (optional) – this one you can skip but it’s better to use it if your model contains overhangs etc. since they will be hard to print without extra help. I had some problems with dissolving the support so I added PVA glue in the water while printing which helped dissolve the support faster than usual. also, remember that PVA is water-soluble.
8) sandpaper (optional) – I used 800, then 1000, and ended with 1500 grit sandpaper to get a smooth surface on the final print. i recommend using a dedicated sanding paper for wood since it’s made from softwood material so it will not scratch your printer bed 😉
9) glue for PLA/ABS – I recommend 2 part epoxy glue mixed 1:1 by volume or 10min super glue. the first one takes longer to dry but provides a stronger bond while the second one can be used faster but tends to break if you’re not careful enough 🙂
10) knife sharpener tool – this one is also optional, just use a metal file instead.
How To 3d Print a Knife?
Can you 3D print sharp objects?
Yes, you can 3D print any geometry if it’s not too complex, but very sharp objects are typically avoided. For example, knife blades or safety-razor blades will come out of the printer with a tip flat enough to be used as a finger-punching weapon.
Fortunately, there are file formats that let you create 3D objects without tiny points, blades, etc., see for example .stl or .obj.
You can then use free software like MeshLab or Blender to optimize the model further by filling in these surfaces with solid material.
This way you can even 3D print things like big sea creatures and other sculptures that look nice and smooth on the outside while still being hollow on the inside.
Special filament like ninja flex can even be used to 3D print custom flexible phone cases.
Stl is the native format of your printer. Have you noticed that sharp edges in STL files are usually very tiny?
That’s because they will not print well, so slicer software tries to round off all tiny edges before printing, but doing this well requires some artistic skill and experience. For more information on how to avoid sharp angles in STL files for 3D printing, see this page. Another way around the problem is using other file formats, e.g., obj or stp.
Slic3r is the slicer software that comes with most Prusa i3 printers.
As explained in this excellent guide by Thömus, one way to round off sharp edges in your stl files is by setting “Simplify threshold” to 0.01 mm in PrusaControl options, see section 2.1d. This setting will make Slic3r turn all angles smaller than 1° into curves (the smallest possible angle for an SLS 3D printer is around 0.2°).
Another good option is enabling only the “Nozzle size compensation” checkbox under Expert mode → Extrusion tab → 3D print start g-code, see section 6a. This way Slic3r will automatically apply the nozzle diameter compensation to all STL files, see section 6c.
List of slicer software for Windows, Linux, and OSX. Even if your printer is not an i3 clone you can still use this guide thanks to the open-source nature of PrusaControl.
For example, MakerBot software has a similar Simplify threshold setting in Expert mode → Infill tab → Floor/Top Thickness, but changing it only affects the models inside the area marked as “floor” (see 5b ).
The main difference between Slic3r and all other slicer software is that with most others you typically don’t change any slicing settings at all: they already come preconfigured for optimal results (see the List of tested slicer software ). If you don’t like Slic3r, consider switching to Simplify3D. It’s easier to set up and works better with some printers.

How To 3d Print a Knife?
The essential slicer settings for smooth prints are:
Layer height:
0.1 mm (100 microns) → if possible, but 0.2 mm (200 microns) is acceptable in most cases; layer height below 80 microns seems not to work well because even tiny overhangs will lift off the bed; do NOT use layer heights above 200 microns!
Optimal print speed
60–80 mm/s → lower speeds result in more detailed prints, while higher speeds allow faster printing; you can use up to 150% of the values listed here if your printer can handle it
Optimal travel speed
120–160 mm/s → higher speeds will make the outer perimeters stronger, while lower speeds make top surfaces smoother; slower is better for small objects because they would wobble too much at high speeds
Flow rate (%)
100% → do not change this unless you are an experienced user who knows what she’s doing
Solid layers (number)
3–5 layers → more solid layers will result in a stronger 3D print but don’t go over 5 or you’ll risk making the model too dense and wasting plastic; for hollow models, 1–2 extra shells around the outside are enough to make them strong enough to hold their shape
Solid infill (%)
20–70% → higher is better for larger models, while lower is better for small models that need to be lightweight; won‚Äôt make much difference for solid infills
Fill type
Honeycomb/Line → this makes top surfaces smoother by creating extra ‘bridges’ between layers of plastic; it will also make the printer louder because it pushes the nozzle around more, but it prevents sagging on large overhangs

How To 3d Print a Knife?
Infill overlap (%)
0.0 mm → this prevents gaps between internal walls where the printer has trouble reaching with the nozzle; if you’re printing a complex model then use 10%; for simple objects use 0% but reduce the number of solid layers
Top/bottom thickness (mm)
0.2 mm → this thins out model perimeters so they don’t become too stiff and therefore print poorly; if a single perimeter is too thick then a single wall will also be too thick, so it’s better to use a lower value for both Top/bottom and Solid layers
Skirt length (mm)
4–8 mm → this makes sure there is plastic in the hotend when starting a print, preventing blobs from being dragged around with the nozzle before extrusion starts; you can use less or omit completely for very small objects because they won’t wobble much anyway
Skirt outward offset (%)
0% → this makes sure there is room for the skirt to print without hitting other parts of the model, so it can be placed anywhere on the build plate; 0% means “as close to the part as possible”
Spacing (mm)
2.5–3.5 mm → this prevents small gaps between perimeters but results in reduced overall strength because it makes internal walls thicker; you can use less or omit completely for very large objects that don’t need much strength
Infill pattern
Zigzag → this causes diagonal infill lines instead of horizontal/vertical ones which are more likely to cause visible seams at places where plastic layers meet; Zig zags may look better but they make top surfaces look more like honeycomb and reduce overall strength, which is why Line or Grid is better.
Fill angle (degrees)
0 degrees → this causes perimeters to be placed next to each other instead of overlapping; will make top surfaces look more like honeycomb and reduce overall strength, but avoid 0 degrees fill for very large objects that need maximum strength (like enclosures); you can use up to 20 degrees for simple models like boxes where the number of top layers doesn’t matter
Solid infill outline overlap (%)
10% → reduces stair-stepping on slanted internal walls inside solid infills; higher values increase print time but result in smoother surfaces, while lower values may work faster but won’t look as good because the larger facets between rows of solid infills will be more visible

How To 3d Print a Knife?
Solid infill line width (mm)
0.4 mm → this makes solid infills look better by varying their thickness from one row to the next; it causes slightly slower prints but is usually worth it for large objects that need a lot of strength, like enclosures
Walls (number)
3–5 walls → a thin wall will break easily, while a thick wall won’t flex much before breaking and is, therefore, stronger; too many walls can increase print time because the printer has to wait longer between traversing long distances with no plastic being laid down, so fewer top layers are faster
External fill pattern Zigzag
→ prevents diagonal angles inside external perimeters which would make them less likely to bond properly to the model; Line and Grid make smoother top surfaces but maybe less strong
Minimum extrusion (mm) 0.5
→ prevents incomplete layers from being created, usually because the printer doesn’t have enough plastic in its hotend; it will reduce print time because there won’t be any gaps between perimeters or solid infills
Primary solid infill line width (mm) 0.6 mm
→ this makes primary (top/bottom) solid infills look better by varying their thickness from one row to the next; it causes slightly slower prints but is usually worth it for large objects that need a lot of strength, like enclosures
Alternate external line direction Disable
→ alternating direction makes diagonal angle inside external perimeters smoother so they can bond more efficiently to the model; this causes diagonal lines on the side of rounded models but is usually worth it for large objects that don’t need much detail

How To 3d Print a Knife? (cre: quora)
Combine small islands Disable
→ this prevents some unnecessary numbers from showing up in the layer view which makes orientation easier when you’re looking at several similar prints at once; recommended if each object has many small perimeters
Bridge flow ratio 40%
→ this reduces plastic oozing during bridges because there is less pressure pushing it out of the nozzle, which means shorter travel moves between peridotites will be faster while still keeping top surfaces smooth; too low and filament may not ooze properly before extrusion starts, potentially trapping air bubbles inside.
3d printed metal knife
There is a new player in the 3d printing market. A Chinese company called Qingdao Unique Products Develop Co., Ltd has introduced a machine that can print three-dimensional objects made from metal.
While the 3d printers on the market so far we’re able to print plastics, some of them also with limited success pieces of wood and precious metals like silver and gold, this new machine actually does what many manufacturers and scientists believed impossible: it prints detailed metal pieces.
Metal parts for jet engines printed by “3D Metal Printers”.
These parts will save weight and reduce costs according to their producer.
How is such an amazing piece of technology possible?
The printer utilizes DMS (Direct Metal Laser Sintering) technology which works as follows: First, a thin layer of metal powder (mostly aluminum) is put on the printing bed.
Then, the printer uses a laser beam to melt or sinter (technical term) this thin layer to make it solid enough to take the next step. This process is repeated until all layers are complete and you end up with your desired object.

How To 3d Print a Knife? (cre: 3dprint)
This method has several benefits:
The printing speed is incredible – 10cm3 in only 5 minutes!
No other 3d printer can come close to that speed.
The geometry of the parts printed by this machine is incredible as well. Every detail down to 0.1mm resolution is possible without any post-processing necessary prior to the application of functional coatings like paint or chrome plating. There are no restrictions in the shape or detail of the object either – if you can think it, you can print it!
The companies president, Dr. Jin Kijiang claims that this 3d metal printer will revolutionize a lot of industries by providing cheap and efficient ways to produce metal parts at home without going through much trouble.
He also considers using these printers for recycling purposes as 95% of the printing materials can be reused depending on his customer’s needs.
This could mean a significant reduction in production costs as well as waste disposal problems – imagine being able to print your own engine parts from old car engines instead of dismantling those yourself or paying someone else to do so every time something breaks down!
Since this technology is brand-new there are still some drawbacks: The printing bed has to be covered with a thin layer of aluminum powder at all times for the process to work.
That means that we’re still bound by the size and shape of the printing bed which is built-in into this printer – no furniture-sized objects are possible yet. Another drawback is that only some metals are suitable for this process – mostly steel, aluminum, and magnesium. Other materials like copper or plastics cannot be printed on this machine yet.
The 3d metal printer is available now in China for around US$80000 – but let’s face it, who actually buys this sort of stuff on their own, right? Well, it looks like at least some companies outside China do!
According to Dr. Jin Kijiang, his company is in negotiations with companies from the United States and Europe to provide customized printers for their needs.
Conclusion
3D printing is a process where data from computer-aided design (CAD) software are translated into digital files and then transformed by additive manufacturing machines to create three-dimensional objects.
Objects created with this technology can be used for prototyping, product development, art pieces, and many other purposes.
The most popular use of these printers has been in the creation of prototypes that help designers test their products before they go to production or for creating replacement parts.
Further Reading:
- Top 7 Best 3d Printer For Board Games
- Top 7 Best Creality 3d Printers
- 7 Best Filaments For Ender 3
- Top 7 Best 3d Printer For Nylon
- Top 7 Best 3D Printer For Cosplay Armor
Tags: #Knife #Supplies #Resin #Bust #Pattern #FEP #Layer #Bed #Warping #Thermistor #Printer #Firearm #Bong