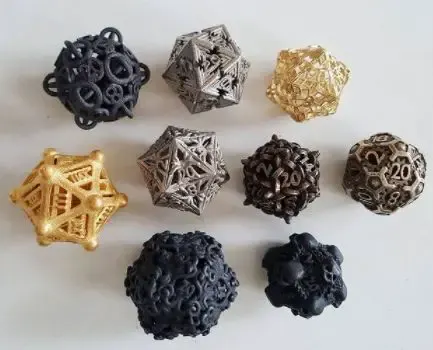
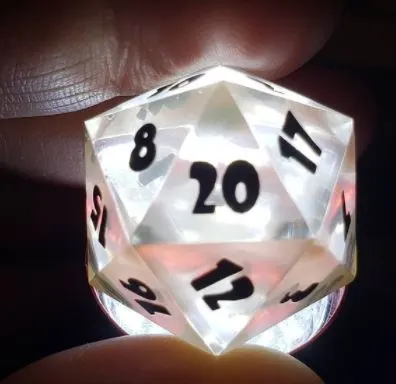
Can You 3d Print Dice Molds? 3D printing is a new technology that has been rapidly gaining popularity over the past few years. In this post, we’re going to talk about how you can use 3d printing for dice molds! In the world of tabletop role-playing games, dice are an integral part of gameplay.
Dice help players determine their stats and level up. But what if you don’t have a die on hand? No problem! You can make your own with a 3D printer!
Related:
- Top 7 Best Dual Extruder 3d Printer Under $500
- Top 7 Best Filament For Lithophanes
- 7 Best Hairspray For 3d Printing
- Top 7 Best Direct Drive Extruder
- Top 7 Best Resin For 3d Printer
Can you 3d print dice molds?
I wanted to make some custom dice for a game I was designing, so I did some research. The more I read about 3d printing, the more it started to seem like an over-glorified glue gun that takes too long and costs too much. I don’t want to buy or rent one of these machines just for this project. Why not consider injection molding?
3d printers produce parts in layers. Imagine stacking two round cakes with icing on top of each other.
Now imagine trying to remove the cake without breaking the icing. It’s possible but tricky! If you had a flat surface between both cakes, then maybe there would be less chance of the delicate structure crumbling apart when you try to separate them… That’s the idea behind an injection mold.
When making molds, they usually start out as a block of steel called a ‘tree’. A 3d printer will produce plastic parts that are customized to fit into the tree. Once they’re properly stacked together, molten metal (usually aluminum) is injected through tiny holes at high pressure to fill all of the empty spaces left by the plastic parts.
After it cools off, you have your newly-minted dice!
You can make some really intricate patterns with injection molding, but I’m only planning on printing some generic cubes for now.
It’s not worth spending thousands of dollars on special equipment just to test this process out. Yet even without that kind of setup, there are still some possible pitfalls that I want to avoid.
One such pitfall is overspray. As the molten metal fills each empty space, some of it will inevitably spill over the edges and solidify as tiny droplets on top of your new dice. If you drop them, those little bits will chip off and fall out. That won’t do!

Can You 3d Print Dice Molds?
So I’m going to design a flat surface on each side of my cubes so that none of the bulkier areas will be forced into contact with droplets of aluminum if they’re accidentally knocked around during shipping or storage. I can also use this same trick for custom-etched designs on top but we’ll get into that later if I actually decide to go through with it (spoiler: I didn’t).
The other problem is that 3d printers like to use really thick layers of plastic.
If I don’t print the cubes with large enough gaps between each side, then my new dice might end up fused together by tiny bumps that form when adjacent faces are printed on top of each other. This isn’t critical, but it’ll make them look kind of messy if you try to pry them apart (also not critical, but still probably undesirable).
To sidestep this problem, I’ve divided each cube face into six equal slices and specified a height for every slice where the printer will pause and allow more molten metal to be injected from below before continuing on its way. Hopefully, this will distribute any droplets evenly over several faces instead of concentrating them into a single point.
The only problem left is the surface finish. Since 3d printers don’t use platens or any other type of roller to flatten out each layer, the result is rough and speckled (that’s called ‘orange peel’ in 3d printing circles).
While it might be possible to sand down the bumps and smooth out the surface with enough work, it’ll probably damage any printed patterns or labels on top in the process (unlike in injection molding where you could just put some protective plastic over your design until you’re done… not that I know anything about injection molding).
Can You 3d Print Dice Molds?
So I’m going to try urethane casting instead
Urethane has a similar appearance to the surface finish of injection molding, but it’s much easier to achieve. I’m sure there are some articles that explain the process better than I could, but here are the basic steps:
1) Fill a container with grainy stuff called ‘casting sand’ (or you can buy premade molds if you’re cheap)
2) Tape your cube face down onto a piece of plastic or cardboard so that none of it is touching any part of the sand
3) Mix up some urethane resin and fill in any remaining gaps to make sure no grains are exposed
4) Wait for everything to dry completely overnight before taking out your print
5) Trim off any excess plastic around the edges and use an X-acto knife or similar tool to carefully lift up a corner of your cube face
6) Detach the plastic from your print and you’re all set!
I prefer using urethane because it’s relatively safe and simple.
You can buy a bunch of different types which cure at different rates depending on how thick they are spread, so I can also experiment with making some more detailed 3d printing patterns by brushing more layers on top before the previous one dries out. Again, there are probably some good tutorials that go into greater detail than what I’ve written here, but that’s just about all I know for now.
So where do we go from here?
Unfortunately, in addition to needing access to an injection molding machine, you also need 3d models to print.
I managed to get my hands on a set of Solidworks files that someone else made for the same die I’m copying (the ‘6’ face in particular), but they’re not exactly meant for this sort of workflow.
The geometry has all kinds of strange cuts and crannies which are probably necessary to ensure your cubes come out correctly, but not so great if you just want to use them as reference images.

Can You 3d Print Dice Molds?
So what should we do? Well… let’s chat!
3d printing is all about solving problems with clever tricks instead of having direct access to the finished product, right?
So even though these dice can’t be printed without modifying some geometry first, why don’t we bring them into Solidworks and play around?
Here’s the process:
1) Design a cube (don’t worry about using mirroring or anything like that, we’re just interested in volume here)
2) Copy/paste your cubes until they fill up the space you want to print (in this case, all six faces of a die). Make sure to stack them such that the XY axes are lined up one on top of the other. Since we’ll be printing this at an angle, it’s important to make sure each layer sits directly on top of another instead of being skewed or rotated off-center. We only have access to half of each cube otherwise! This is also why I’m stacking my dice in two separate parts, just to be safe.
3) Delete the cubes that won’t be included in the final print (in this case, all of them except for the furthest-back layer and a single cube from the middle). We only need one ‘6’ face, but we’ll keep as many ‘1’s as possible so it prints more quickly. Also, note that I changed my background color to black so you can see the cubes better against their surroundings… those edges would have been completely hidden if I’d left it as white!
4) Play with your newly combined geometry until it looks right! In Solidworks, go into Surface mode and smooth everything out a bit if it looks too blocky or pixelated. You can also color the different layers to make this easier, but I found it’s pretty hard to get everything looking right without getting too distracted by all the other stuff you can do.
5) Once you have your final 3d model, press F8 so you can see the outside edges of your geometry… this will be important next! Make sure to save a copy of your file at this point before doing anything else.

Can You 3d Print Dice Molds? (cre: myminifactory)
6) Switchback into Solidworks’ regular mode and delete all of those ‘back’ cubes we just hid away.
This should leave behind only one cube for each face in our final printing orientation. Note that even though these are ‘1’s or ‘6’s or whatever, they’re actually still named after what letter they’ll produce when the die is rolled.
7) Now that we’ve got our geometry in order, go ahead and press F4 to change your view so you can see the inside of your solid… again, this will be important next! You’ll notice there’s still lots of stuff messing up our nice cube shapes, but don’t panic! We’ll actually be hiding most of it away when we’re done.
8) Go back into Surface mode and press = (or + depending on what version of Solidworks you’re using) until you get to the layer that corresponds with the outside edges of your cubes like before. Then go into a Plane mode, pick an edge near where one cube touches another (in this case I picked one corner between two cubes), and click on ‘Fix Edge’.
9) Solidworks will then highlight your currently selected edge in red. If your edges aren’t all highlighted, you’ll have to go back into Surface mode and pick a different edge until it’s the only one left red. Once this happens, press F8 again so you can see the outside of your solid once more… if everything went right so far, you should be able to see where each cube touches another through those thin edges! This is why we had to keep copying our cubes instead of using mirroring earlier; if we could make transparent faces, they’d overlap inside our model because they wouldn’t know which ones were supposed to be behind or in front!
10) With the inner edges still selected, go into the Features tab and click on ‘Cut’. Decide how deep you want each cube to peek into your die (I chose .2 inches here), leave everything else at their defaults, and hit OK.
11) And now we wait! This process took my computer about four minutes with all six cubes selected… hopefully yours won’t take any longer than that, but if it does you can always come back later or try using Solidworks’ power functions to speed it up.

Can You 3d Print Dice Molds? (cre: makerbot)
12) Once the cutting is finished, switch over to its wireframe view by pressing F7 so you can see all of those lines that were created when you made your cut.
For some reason they’re not visible in Surface mode or the regular wireframe view, but they are in Shaded or Hidden detail so don’t worry. Make sure to save another copy of your file at this point just in case!
13) With the CUT lines still selected (make sure it’s only those, not the outer edges), go into Surface mode and press P to automatically combine all of your surfaces into one solid model. Then press F8 again so you can see that everything on the inside is gone… at this point, you can probably safely delete all of the individual cubes because Solidworks will remember what cuts it made earlier when you combined them.
14) And now for some cleanup! I recommend using different colors for each layer if possible to make it easier to identify later on… for example, the two outside layers might be blue and teal while the four inner layers are red, purple, green, and yellow. Switch to Color-ByLayer mode (F5), select all of your inside faces (remember: we turned off cap ends earlier so cap thickness doesn’t matter!), and color them in.
15) Once you’ve identified which layer belongs to each face, hide everything but one layer at a time by clicking on it so they’re all highlighted in blue. Then go into Surface mode again and press W to start ‘welding’ your surfaces together wherever adjacent faces share the same material. Hover over an edge that’s shared between two adjacent faces until the cursor turns into either a surface ‘welding gun’ or a surface ‘paint roller’ depending on which Solidworks version you’re using, then left-click and move the cursor to another face that’s made of the same material.
Wherever it touches will be joined into one solid body!
My Surface mode is set up so that I don’t have to hold down any special keys to do this with just the mouse; if yours is different, make sure you press A when you finish welding each weld seam instead of letting go. Otherwise, you’ll end up with two separate bodies again when it’s time to merge your layers together.

Can You 3d Print Dice Molds? (cre: reddit)
16) Once all four faces are welded in, select everything in Surface mode (Ctrl+A), right-click on a space inside your model, hover over ‘Merge’, and select ‘At Last’. Solidworks will now combine all of your individual cubes into one solid body. There are still quite a few caps ends hanging around, so let’s get rid of them next!
17) Switch back to Wireframe mode (F7), click on the Edge tool… it’s the first button under Line/Curve in the Sketch tab. It looks like two arrows pointing towards each other with nothing between them, but that arrow on the left is actually three lines instead of just one.
Double-click once somewhere inside your model to place an edge at that location, then double-click again someplace else to add another edge parallel to it.
Now hold down Shift while you do this several times to make it easier… Solidworks will automatically select the four edges that are currently touching each other, so all you have to do is click on an edge, in turn, to get rid of them, which looks like a bar with two arrows at either end. Keep doing this until there’s only one cap end left!
18) Now switch back into a Surface mode (F5), select everything again (Ctrl+A), then click the Weld button under the Weld tab. It looks like two pieces of metal touching head-on instead of side-by-side, but it’s the second icon from the left under ‘Surface’ in my version. Make sure your cursor isn’t anywhere near any existing seams when you click; if necessary, disable the ‘Forces’ option under Display Options (the icon to the right of Weld) so it doesn’t try to weld things together that you don’t want to be joined.
Solidworks will go through and make all of your remaining seams into one continuous surface, which should put a smile on your face because now they look a lot better! The last thing we have to do is remove those cap ends so we can see what’s going on inside.
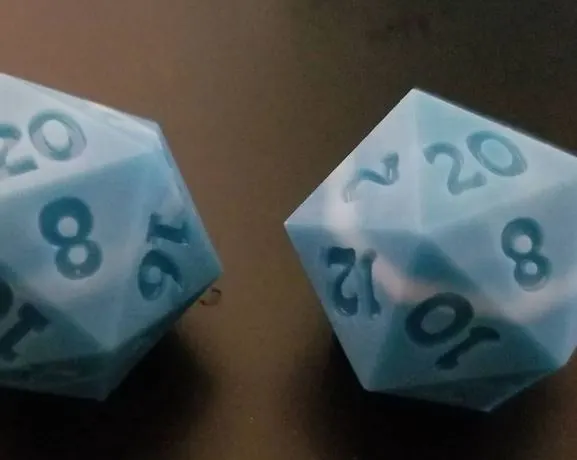
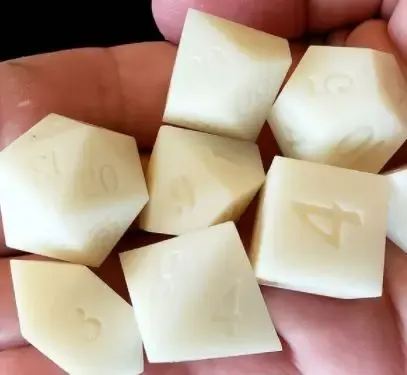
Are 3D printed dice balanced?
3D printed dice will be a little uneven. But it won’t be too bad if you do it the right way. It may not be perfect, but that’s fine for practical purposes.
Conclusion
3D printing is a new technology that many people are still getting used to. But if you’re looking for dice molds, it may be worth considering this option! There are numerous benefits of doing so and the process is relatively simple with just one caveat – you need high-quality mold material. You can find these materials at your local hardware store or online in most cases.
We hope our blog post has helped answer any questions about how to get started using 3D printing for making dice molds. Don’t hesitate to contact us anytime if we can help out further!
Further Reading:
- Top 7 Best 3d Printer For Board Games
- Top 7 Best Creality 3d Printers
- 7 Best Filaments For Ender 3
- Top 7 Best 3d Printer For Nylon
- Top 7 Best 3D Printer For Cosplay Armor
Tags: #Stlfile #Silicone #Wood #Software #Clothes #Guns #Gears #Zirconia #Outside #Metal #Shoes #Stamps #Miniatures #Clear #Garage #Funko #Phone #Graphene #Guitar #fishingLures #EvaFoam #Solidworks #Sketchup #Cinema #Engine #Toys #Pins #Circuit #food #Rings #Delrin