Can You 3d Print A 2d Image? 2D images are everywhere, but have you ever wondered what it would be like to take one of your favorite 2D images and 3d print it?
Well, wonder no more! In this blog post, I will show you just how easy it is to convert a 2D image into a 3D object.
Related:
- Top 7 Best Dual Extruder 3d Printer Under $500
- Top 7 Best Filament For Lithophanes
- 7 Best Hairspray For 3d Printing
- Top 7 Best Direct Drive Extruder
- Top 7 Best Resin For 3d Printer
Can you 3d print a 2d image?
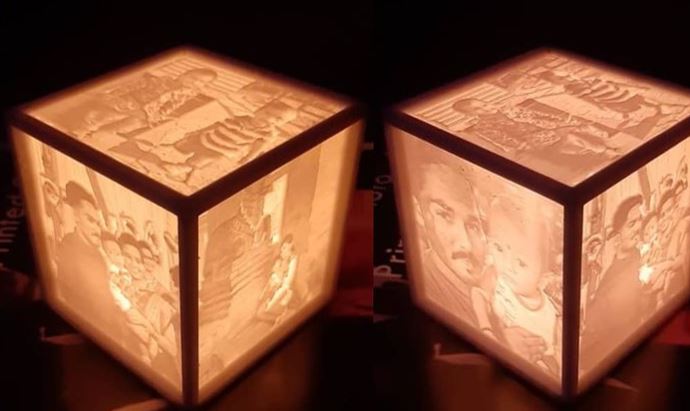
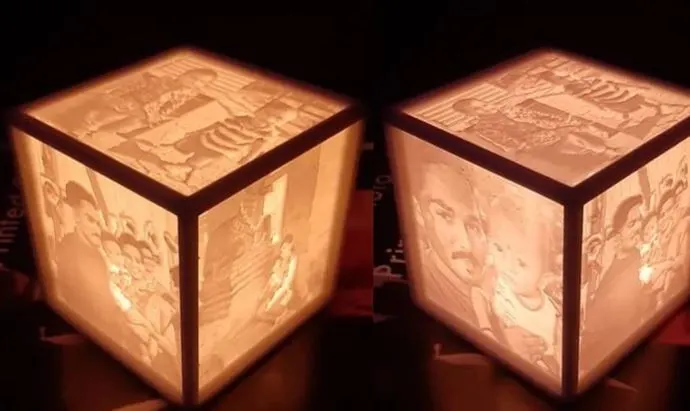
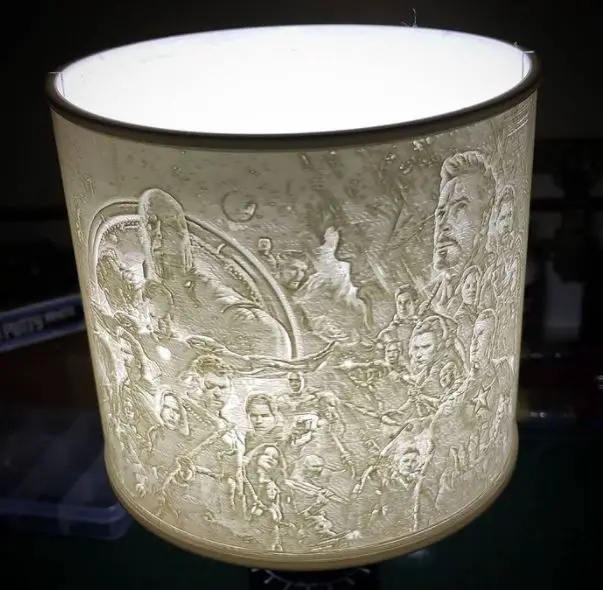
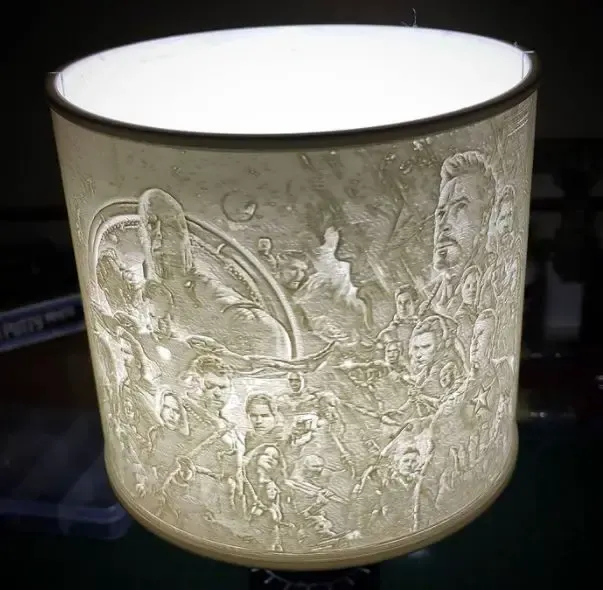
Yes, another way to turn a 2D photo into a 3D object is lithophane. Lithophanes are shaped with thin translucent porcelain.
It looks like a picture, but has depth and can be viewed from different angles. The thin nature of the porcelain allows light to shine through it, creating images that appear three-dimensional.
Lithophane images were first created by cementing flat brass cutouts into a tray filled with acid.
This would leave an indented image in the tray after the removal of the cutouts. The acid would not burn through the brass but would etch away areas of copper alloys such as pewter or white alloy.
These types of images were used to create lampshades and wall plates in the 19th century.
These days they are still popular for decorating lamps and picture frames.

Can You 3d Print A 2d Image? (Cre: sculpteo)
How to turn a 2D photo into a lithophane image?
The process of converting an image to lithophane is digital and requires Photoshop knowledge. There are many free online tools that will convert images to lithophanes, but the process is not always accurate.
These programs use templates created by users. It’s possible for someone to upload a template that doesn’t match the input requirement.
The most accurate way to get your photo turned into lithophane is to do it yourself in Photoshop.
Lithophane image of Francois Gissy’s Guinness World Record-breaking 208 mph bicycle ride.
1) Open your favorite 2D image editor, such as Adobe Photoshop.
2) Create a new image in the size of 300 pixels/inch.
3) Adjust the levels of your original photo to increase contrast.
4) Smooth out any lines in your image using the smudge tool (optional).
5) Crop down your image to just around the face area. This leaves room for error when transferring the image to lithophane. If your image is so large you can’t crop it down, just create a template with the same dimensions as your photo.
6) Create a new layer and fill it in white. This will be your template for transferring the image onto a lithophane slab.
7) Copy and paste your original photo into the white layer. You can use either transparency or a mask to make a transparent copy of your image, but I find transparency to be easier and more accurate.
8) Using the displacement map filter in Photoshop, clip your pasted photo onto the template layer. You can find this option under Filter>Distort>Displace.
9) Adjust the scale of your photo to a smaller percentage, around 50-70%.
10) Add a drop shadow layer effect to the image. This will help it stand out from the slab. You can also play with other layer effects such as glows and bevels; just don’t overdo it. These are optional though, you can leave your image in black without any drop shadow or extra effects.
11) Save the file in .png format, this is important! If you save it as anything else Photoshop won’t process it when converting to lithophane.
12) Open up Zerene Stacker or Helicon Focus software. Load your lithophane image. Make sure to tick the “Invert Horizontal” option in Zerene Stacker or turn off vertical source images in Helicon Focus. This ensures that the image is properly oriented when stacking it.
13) Stack your image a few times to get a nice looking object with good depth and detail
Zerene Stacker has a better interface than Helicon Focus, but it’s slower. There are other stacking software available if you want to try something different – LighTake StackShot, Combine ZP, and EnfuseGUI are just some of the options out there. You can also go for manual stacking with exposures shot at around 2 seconds.
14) After stacking, export your file as a full color .tiff and open it in Photoshop. Make sure that the transparency isn’t flattened.
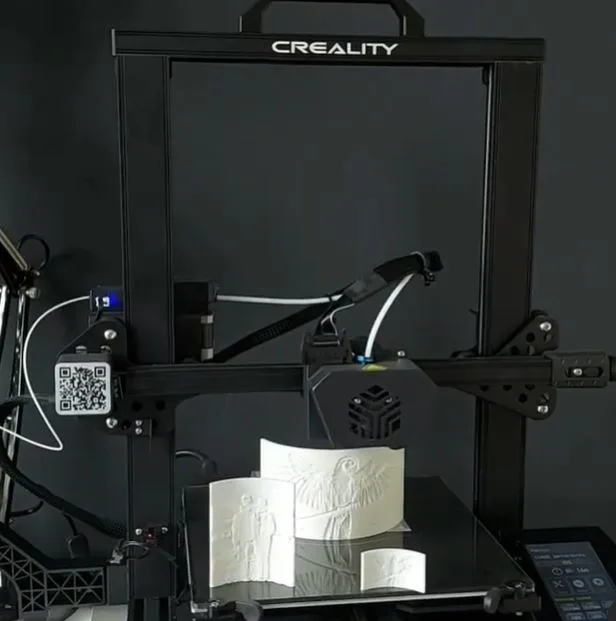
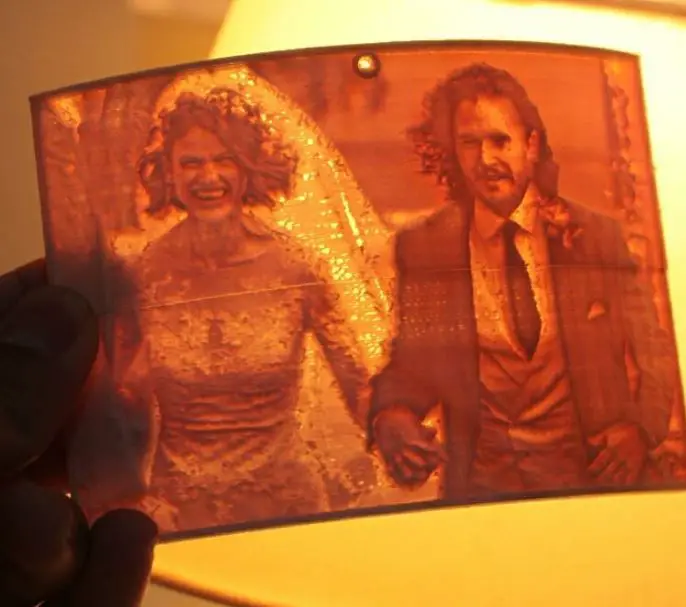
15) Now you can use any method of transferring images to transfer this image to a lithophane slab. The “ink-on-soda-bath” method is very popular and produces great results. This is the most common method used at online lithophane shops like Artmolds.
16) After transferring your image, you can also do some manual touchup using an airbrush and a white paint marker (make sure to use a water-based marker, or else the ink will dissolve the base of the slab). You can also touch up the image with a penknife. If you do any major repair work, make sure to let the slab sit for a few hours so that ink can fully permeate and seal the lithophane before handling again and cleaning up.
To find out more about how lithophanes are made, check out this article:
17) Save your final image in .png format for best quality.
18) Now you can order the lithophane with any design or logo on it! Just upload your finalized file through an online lithophane maker like Artmolds, Shapeways, or Photo blocks. You can print your finished photo-litho at any size because the image is scalable. You can also choose to have it printed on glass or acrylic material depending on the look you want for your final product.

Can You 3d Print A 2d Image? (Cre: imaterialise )
Can you 3d print from a picture?
You can’t make a 3D model out of an image file, a PDF, or a picture. Before you can 3D print anything, you need to have a 3D model. A 3D model is when people turn your photo into something virtual. There are free apps like Qlone or Smoothie 3D that can do this.
Machines like the MakerBot Digitizer make it easy to turn a picture into a 3D print. You can also get a free 3D scan for your 3D model from services like 123D Catch, 123design, or Autodesk’s 123dapp
You can’t print directly from an image file, you’ll need a way to turn that into a 3D file.
There are several ways to do this, although none is very easy. Here are some of your options:
Option 1: If you have access to the MakerBot Digitizer
The MakerBot Digitizer (now discontinued) could scan photos and turn them into 3D files. It was a fun hack, but it wasn’t very easy to use.
Option 2: 3D Scanning Services
The next best option is to send your picture to one of the many services that will turn it into a 3D file for you. You’ll get back a mesh or polygonal model, which you can then import into your favorite 3D program and edit. This is not an easy option for beginners, but if you have a good understanding of what you’re doing it should be fine.
Option 3: Use a Polygonal Scanner
A polygonal scanner will scan the surface of your object to create a mesh/poly model. These scanners are a lot more expensive than a 3D scanner, but they’re much easier to use and that makes them an interesting option for people who want to get started with 3D scanning.
Option 4: Use a 3D Printing Service
Finally, you can always send your picture off to one of the many services that will print it for you (and mail it to your house). This way you don’t need to worry about 3D scanning, 3D modeling, or anything. It’s all done for you!
Option 5: Use a Software of Your Own
This is probably the hardest option. You’ll have to create something yourself that will turn your image into a 3D file. There are several APIs, like Microsoft’s Kinect for Windows or Intel’s RealSense SDK, that make this easy. You’ll also need to know how to work with meshes and 3D file formats.
Conclusion – Can You 3d Print A 2d Image?
This article has been a ton of fun, but we hope you learned something along the way. If so, please share this blog with your friends and family on social media!
Further Reading:
- Top 7 Best 3d Printer For Board Games
- Top 7 Best Creality 3d Printers
- 7 Best Filaments For Ender 3
- Top 7 Best 3d Printer For Nylon
- Top 7 Best 3D Printer For Cosplay Armor
Tags: #Technician #Nozzle #Supplies #Filament #Bridge #Vented #Plastic #Medical #Classroom #Change #Image #Harmful