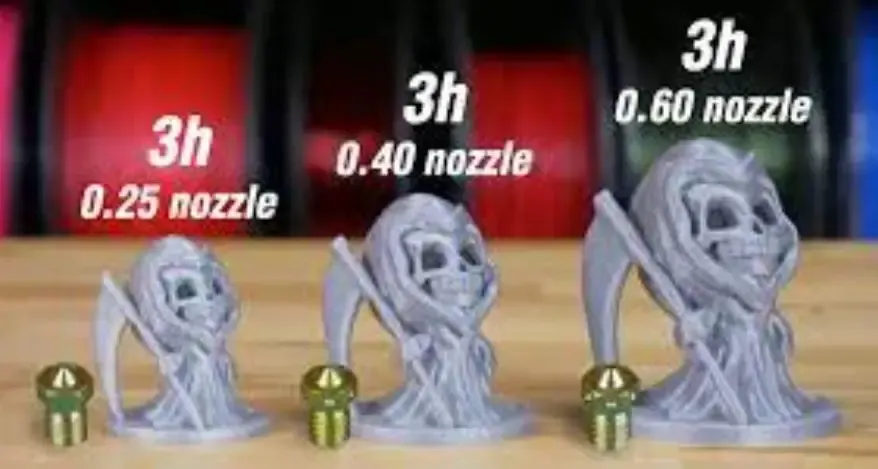
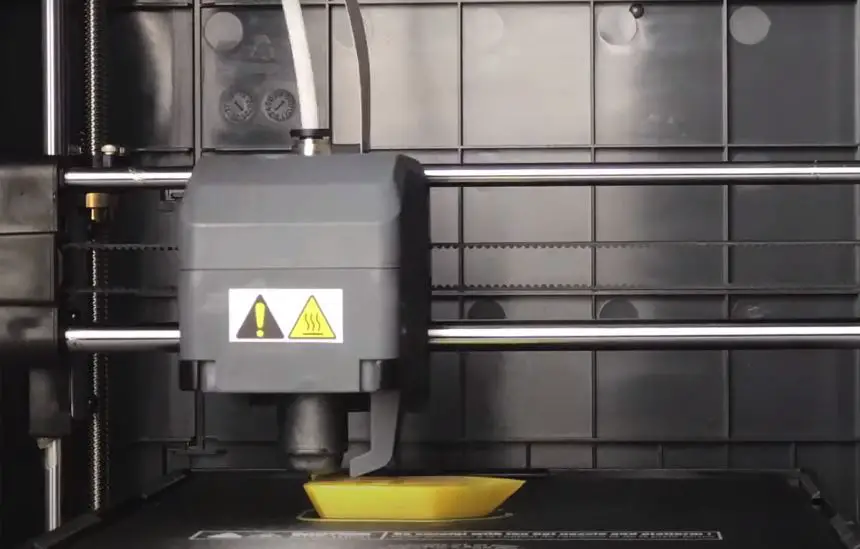
The 3D printing nozzle is one of the most important parts of a printer. It’s responsible for creating any shape or form, and it’s also what creates the layer height. That means that when you change your nozzle, it will affect how your prints look – even if they’re not too bad to start with!
A good rule of thumb is to replace your nozzle every 50 hours of use.
You can check this by counting how many times it has brushed past the bottom edge of the build plate (this number should be around 100).
If you find that yours needs replacing sooner, then try checking out our blog post on tips for improving print quality.
Related:
- Top 7 Best Dual Extruder 3d Printer Under $500
- Top 7 Best Filament For Lithophanes
- 7 Best Hairspray For 3d Printing
- Top 7 Best Direct Drive Extruder
- Top 7 Best Resin For 3d Printer
How often should you change 3d printer nozzle?
There isn’t a time you need to change your nozzle, but it will be best if you do it every 4-6 months. This really depends on how often you use your 3D printer, what types of filaments you are using, and the quality of your nozzle. There are many factors that determine how often you should change your nozzle.
I have an idea for a 3d printing business model idea! I think there needs to be a machine out there, or something where you can take in all your broken / not working nozzles and get them swapped for new ones without having to buy the entire thing over again.
Not sure if this is viable or has been done before, but it would save people tons of money on materials they already use.
You do realize this isn’t really feasible, right?
The main reason is that printer manufacturers sell their printers cheap because they make up profits by selling replacements for worn-out parts (like the hot end). If they sold replacement hot ends by themselves, then they would have to sell their printers at a much higher price.
Nick – “nozzle change” isn’t the same as “nozzle replacement”. A nozzle can be changed without replacing it, saving you money.
I agree that if a printer company sells a complete hot end assembly for $100, but only charges you $40 for an upgrade simply because you told them your hot end is worn out after 1 year of use, even though it’s still working fine, I find this very inconsiderate…
But what can we do about it? This will happen whenever there is demand for something and people are willing to pay higher prices for it.

How Often Should You Change 3d Printer Nozzle? (cre: quora)
How to clean a nozzle?
Well, the nozzle basically cleans itself. Just make sure your extruder body is hot enough to do so (if it ever becomes blocked for whatever reason, you should be able to clean it with a copper wire). For that, you just move the filament until there’s enough molten plastic to push through instead of feeding it into the Bowden tube.
You’ll see the filament swell up inside the PEEK/alu heartbreak and very quickly unclog it. If that doesn’t work use an old toothbrush or carbon brush to clean any remaining filament out of the heat break.
E3D has some good instructions on how to do this here: Cleaning Bowden Nozzles The only real to “deep-clean” your hotend is to disassemble it completely, but this should be done with caution as the fragile PEEK insulator can crack easily.
If you are getting filament jams/misfeeds more often than not, then there might be something wrong with the extruder mechanism itself. A good indication of potential trouble is when your prints fail mostly due to “warping” or severe layer shifting/splitting around corners or near perimeters.
If this occurs frequently, chances are that will help but replacing certain parts in your extruder mechanism will probably be necessary.
For example, if you are using a genuine Prusa i3 with the steel gray/black X-carriage OR if you have upgraded to MK2+ or MK2S then chances are that you will need to replace all of your original plastic bearing mounts with reinforced ones.
Additionally, it is advisable that you upgrade your filament guide tube from PTFE to e.g. stainless steel since its much more wear-resistant and compatible with high heat applications (e.g. printing at 250+°C). Apparently, some users have reported severe jamming issues even on MK2/S printers due to faulty quality control so this might be worth looking into as well:(
There also seems to be a significant improvement with the newer MK3 version so it might be worth checking out as well.
According to some users, PLA seems to stick more than ABS filament in the extruder throat (especially when you are starting up), so that can also lead to misfeeds and jams, apparently. The workaround is just to keep pulling on the stuck filament while manually advancing it one layer at a time until you get enough molten material behind it for it to push through.
This should hopefully unjam whatever has been stuck inside your extruder mechanism as well as dislodge partially melted filament strands from the hotend melt zone which tend to accumulate during printing and cause clogging issues if not removed before they harden back up again.

How Often Should You Change 3d Printer Nozzle? (cre: reddit)
How to replace nozzle Ender 3 v2 3d printer?
If you have to replace the nozzle of your Mini Delta 3D printer, then this article might help.
There are several difficulties that can be encountered when changing nozzles on the Ender-3 FDM printer. The first is how to install the new nozzle without damaging it due to thrust force from springs, and many other users have found this problem.
After some research, we developed a solution for installing or removing the nozzle without any difficulties.
This should work for other types of printers as long as they use M4 screws. By placing these nuts at each end of threaded rods under the print bed, there should be enough space between the springs holder and the nut to make room for nozzles installation or removal. You can easily do this by yourself without much effort.
I will show you how to do it on MY UNIVERSE DELTA 3D printer, but the principle is similar to any other printer.
Just use the right length of rods and nuts to make the distance between them larger than normal nozzle installation spacing.
In this case, all you need is longer M4 screws and matching nuts (not provided by the manufacturer).
How Often Should You Change 3d Printer Nozzle?
To space down the nut, we used a bench vise with serrated jaws at each side of the nut, but there are many ways to achieve this job. If you want a quick solution, please check out our “Delta Nozzle Locking Clamp” product page.
- 1st step – remove left part of the assembly – Gantry – Y-axis
- 2nd step – remove right part of the assembly – Gantry – Y-axis
- 3rd step – Remove support for small mm rod
- 4th step – secure nozzle height adjustment knob with a zip tie to make it stay in place. This will allow the free movement of rods during the installation process. Without this, you might have difficulty removing nuts from the threaded rods as you push them up. They will stick above nozzles and prevent them from being removed. Don’t forget to do this before the next nozzle swap exercise
- 5th step – unscrew the M5 screw holding the upper x-axis carriage and remove it, as well as the lower one with a nut attached to it.
- 6th step – put 2 M5 screws with nuts on each side of threaded rods. Make sure that the distance between the outside edge of nuts is wider than normal nozzle installation spacing on your printer. In this case, it’s 14mm, so we used 15mm long screws and nuts. Remove zip ties from nozzle height adjustment knob and lift up gantry assembly to make room for nozzles installation or removal.
- 7th step – install new nozzle, turn v-wheel by hand a few turns to make sure it moves freely, release the locking screw on the right side and slide hot end-all way down. Repeat this process for both sides using the same pattern as shown in the photos below:
- 8nd step – after you have finished installing new nozzles, align them with each other and install M5 screws back one by one.
- 9th step – lower down the gantry assembly to make contact between hot end carriages and threaded rods, then screw in the upper x-axis carriage with both M5 bearing nuts that you have removed from previous steps to lock them in place.
- 10th step – do not forget to lift up the gantry lift handle to allow room for movement of a small mm rod under the print bed. This is important as it might cause problems when trying to level nozzle height if this part gets caught on the rod and doesn’t move freely, so we advise adjusting it before any other calibration procedures.
- 11th step – tighten all M4 locking screws on the left side tensioner and right side of the carriage to secure carriages and rods together.
- 12th step – doing this on the photo shows the distance between nut and screw that we added for nozzle installation or removal.
When removing the nozzle, simply grab its base with fingertips from underneath and pull it out using straight steady force without any pressure.
Do not change the angle at which you pull as this might destroy the hot end ceramic insulation insert if it’s a PEEK barrel-type design.
When installing a new nozzle, clean old grease from threads on the bottom of the heat block and pour fresh grease before inserting it into the heat block.
The threaded rod should go all the way through the nozzle if you do not want to damage its ceramic insert. This part is optional as well, but we prefer to do it this way for all new nozzles that we install.
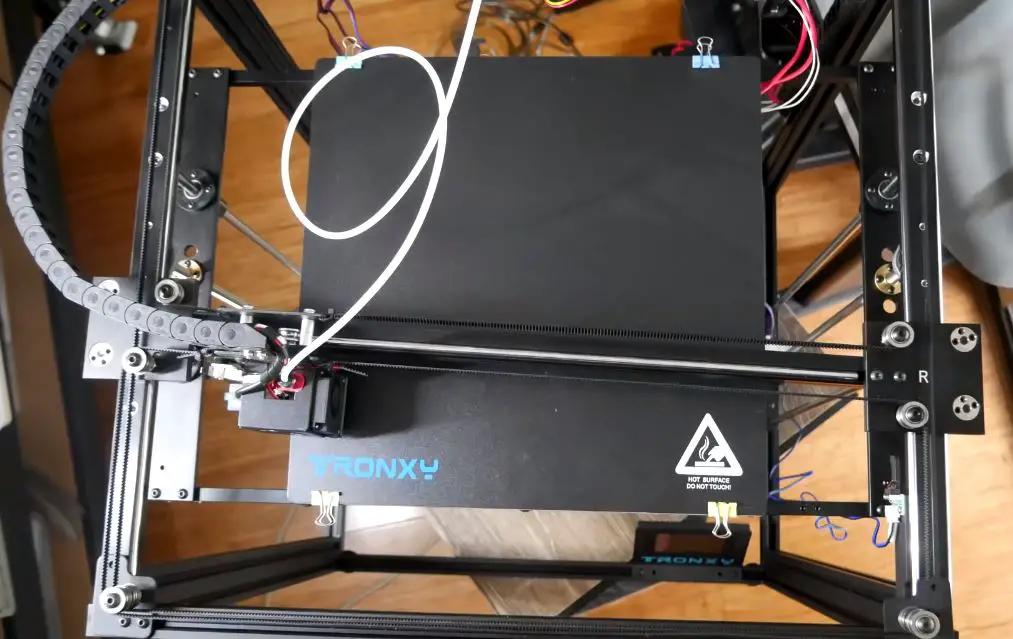
As always – these are just suggestions and best practice tips that worked for us during our initial setup of the Tronxy X5S printer. If you have some other ways to achieve better results, feel free to share your thoughts in the comments section below!

How Often Should You Change 3d Printer Nozzle? (cre: stackexchange)
Ender 3 damage nozzle upgrade guide
I don’t know if this is the correct thread to post it in. Let me know if I should move this to another topic or maybe someone can link me to an existing topic here.
In any case, I’m going to share my experience with 3d printing a nozzle upgrade for my printer.
It’s not too difficult and you have full control over the design so it might be helpful to someone else as well so I’ll publish what I did here:
3D model – 3d print
The key idea to make the nozzles durable is to turn it into a “pipe” with thick walls.
I used Onshape for this purpose. Normally you would need to generate an STL file using that software but there’s also an alternative export option to generate GCODE directly.
This is very convenient because turning the geometry into G-code will allow you to preview how it looks, without rendering it in 3d first.
While doing so, I realized that the size of the original nozzle was 17mm diameter by 8mm height if my memory serves me well so I decided to base my design on those dimensions – which are standard anyway – instead of making up new ones.
Preparing everything – Brass Nozzle
Before starting, have everything ready. Easier said than done because you’ll need to change several things in Cura and then you’ll end up printing something else too as I did.
Cura settings: no automatic start/end Gcode (we’ll use slic3r instead)
nozzle: 0.4mm diameter (same as the original – or maybe a tad larger will do but not much). As for height, keep it at 8mm; it seems too tall for my printer so make sure not to go higher than 9mm (that’s what I tweaked in slic3r); even if it works with 10mm, don’t… trust me on that one 🙂
- temperature : 215°c/ 405°f for PLA
- print speed : 60mm/s
no supports or rafts – not needed with this design! It’ll act as a raft by itself. If you want to be on the safe side, you can print it first at 50% of regular speed and then switch to full speed later. The nozzle will work fine either way.
Printing filament
Time to print… but what do I print first? You could try printing this Nozzle Seal first if it doesn’t require too much detail because that’s best printed without having the heat block attached. Then just remove it afterward.
As for me, I decided to go with the Heat Block which will actually help me align everything perfectly so no separate print is needed there (it requires zero calibration).

How Often Should You Change 3d Printer Nozzle? (cre: 3dprinterly)
Protip: it’s best to print the nozzles in pairs (two pieces for each hotend are needed, not only one).
The heat block will also act as a support during printing so you can remove it after the first layer has finished. I actually removed all supports by using Cura’s built-in function that can be activated through Expert -> Open Expert settings. You’ll find the setting there that refers to “Support – Remove support material”. By default, it’s set to Never active but you can change this if you want.
Do NOT use Cura’s built-in upgrade function! It sucks and always fails on me! Just create a new profile with these exact same values and then import your existing printer into that profile without touching the other settings and then print it from there. I don’t know why but the built-in upgrade function will always fail for me. It doesn’t matter if you use a profile with or without modifications, it fails… every time!
https://www.youtube.com/watch?v=aR2Dg_9aU6Y
Conclusion
Changing the 3d printer nozzle is an important part of maintaining the quality and efficiency of your printing.
The frequency with which you change these nozzles will depend on how often you use them, so be sure to check in periodically for instructions from our experts or refer back to this blog post.
Further Reading:
- Top 7 Best 3d Printer For Board Games
- Top 7 Best Creality 3d Printers
- 7 Best Filaments For Ender 3
- Top 7 Best 3d Printer For Nylon
- Top 7 Best 3D Printer For Cosplay Armor
Tags: #Technician #Nozzle #Supplies #Filament #Bridge #Vented #Plastic #Medical #Classroom #Change #Image #Harmful
Tags: it really highly depends on your requirements and usage, how often once or twice a week, when it gets damaged, how frequently you, when should change nozzles, you print frequent, standard brass nozzle, issue smaller nozzle, recognizing ctb file, hardened steel nozzles, printer nozzle removal, brass nozzle metal, nozzle removal tool metal, nozzle torque wrench metal, factory brass nozzles metal, samples tip, accessories ago, brass, clogged, stock tip, ruby, email, temperature tip, metal