When making 3D prints, you might have problems from time to time. For example, some users have recently asked, “How to get rid of zits on 3D prints?”.
Many reasons are leading to the issues.
Hence, I would like to explain the possible causations before providing valuable solutions to fix the zits.
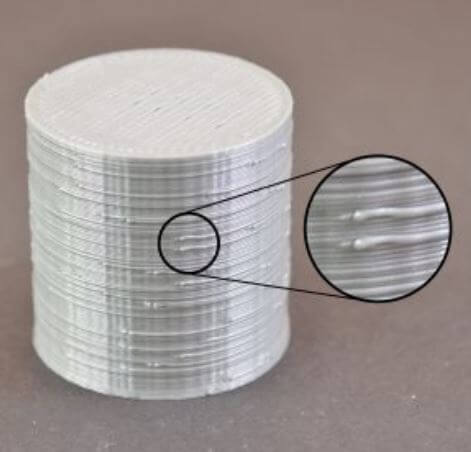
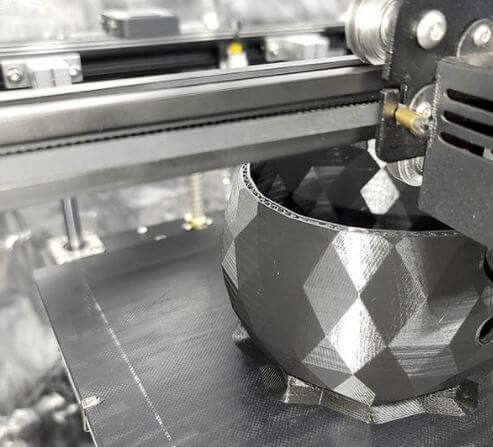
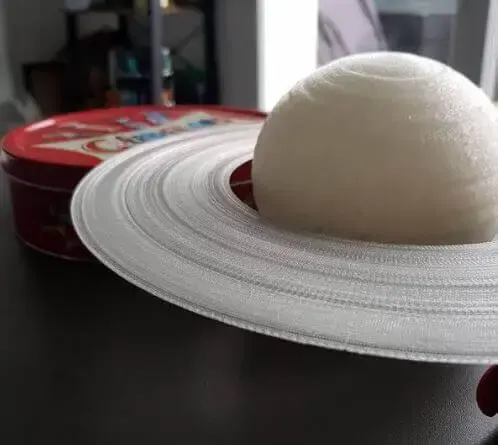
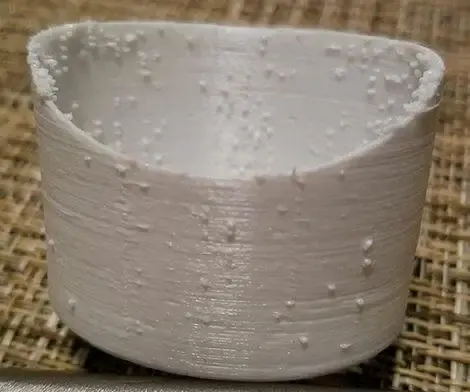
Zits on 3D prints (Source: simplify3d )
Related:
- Why Is My 3d Printer Not Printing Smoothly? Complete Guide
- What Is Salmon Skin 3d Print? Salmon Skin Effect 3D Printing
- How To Make A 3d Printer With A 3d Pen? A Step-By-Step Guide
- When Will Full Dive VR Be Real? GUIDE TO VR TECH
How To Get Rid Of Zits On 3D Prints: A Quick Answer
To remove zits on the prints, you should think about making the filaments completely dry first.
Next, check if prints settings are accurate.
Wiping, retraction and coasting settings play a crucial role in making the issue.
Moreover, inspect the extruders, printing temperature, and printing speed would help alike.
What Causes Zits On 3D Prints?
1. Coasting settings
Once you are a newcomer, you might be unfamiliar with the complicated settings of a 3D printer. Then, the mistake like zits is inevitable.
To solve the problem, find out the exact cause is my recommendation.
For example, some users might set the coasting values incorrectly.
The setting is to stop the extrusion when the nozzle reaches the last layers.
In most machines, the values of the coasting distance are from 0.2 to 0.5 mm.
However, the number can be different in various types of printers.
Therefore, test the value first will give you the best result.
2. Retraction settings
The zits appear when you retract too much for the materials. In standard cases, the filaments do not leak out between each movement.
That has its roots in the nozzles pulling back the threads through the Bowden tube.
Then, the retracted threads are pushed back again through the nozzle to start a new extrusion.
However, once you set the retraction point too high, the thread extracted comes with a particular amount of air.
In the subsequent extrusion, they remain air is heated under pressure in the nozzle.
That is when the blobs appear.
There is also a popping sound made right after the air becomes heated.
3. Wiping settings
Once you want the 3D printers to operate better with their retraction, you should use the wiping settings.
Significantly, the sets are valuable to avoid the threads retracted at the same position.

There are two popular wiping settings in a 3D printer: “Outer wall wipe distance” and ” Wipe nozzle between layers.
” The last option will make you hide the Z-seam quite well. But once you put the distance too high, you may see the opposite result.
The second option can be seen in many devices with various default values.
It would be best suppose you tried each value before tweaking the wipe retraction distance.
4. Wrong extruder pathing – Blobs and zits
The extruder pathing is the fourth common reason leading to the blobs, warts, or zits.

As with other complex machines, it is hard to force any extruder to work all the time effectively.
In some cases, there might be blemishes cause it has to stop and start continually.
Primarily, when it comes to the joints between two ends of two layers, the extruded melted plastics are found harder to connect.
Of course, there are still some solutions to reduce the zits.
5. Over extrusion (filament)
Over extrusion means the filament pressure in the extruder becomes too high, creating blobs.
The abnormal pressure might result from the wrong retraction movements.

When the settings are incorrect, the pressure is not relieved in time.
The intense force on the threads causes the zits in the middle or start of a layer.
6. High temperature
The imperfections can also appear once you set the printing temperature too high.
That is the ideal condition for producing hot air, which would strongly react with the heated threads.
The unwanted reactions can lead to zits at any time.
7. Unstable printing speeds
When you notice the slicer settings, click on the more advanced settings to see the printing speeds.
There are many speed options to print different sections like the first layer, outer wall, or infill.
Once those speeds change too often, it can affect other parts and make zits.
For instance, it can cause under or over extrusion, high pressure in the extruder, or abnormal temperature.

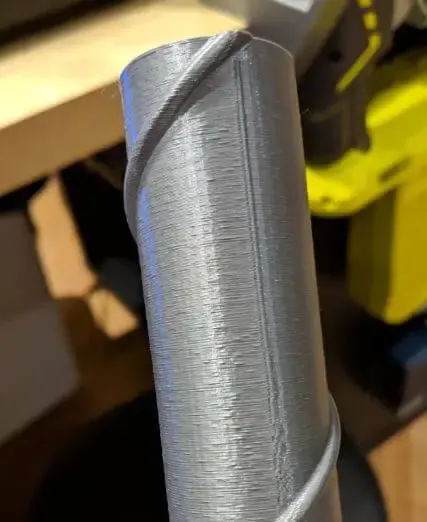
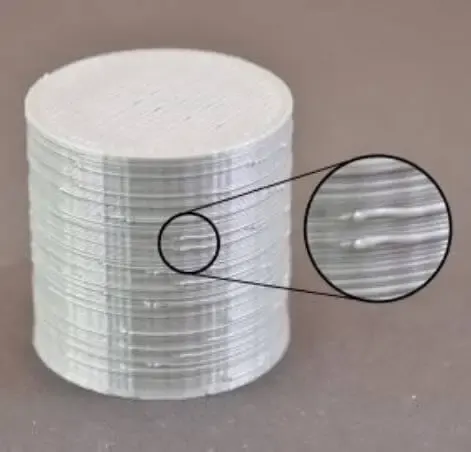
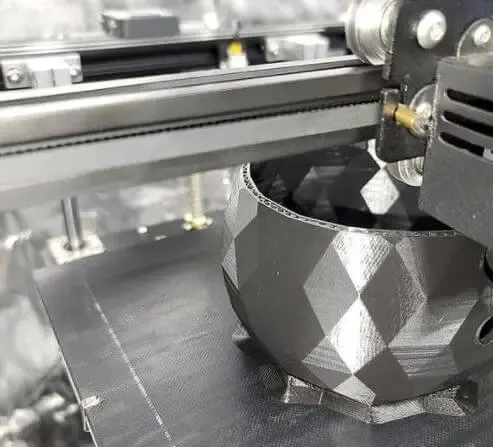
Small blobs on cylinders (Source: reddit )
How To Get Rid Of Zits On 3D Prints?
Once you understand the leading causes of those imperfections, it is easier to find the solutions.
Below are some valuable methods for particular culprits.
1. Adjust printing settings
To tackle the problem related to wrong printing settings like retractions, using trial and error would help.
That being said, a default value is not always suitable for your 3D printer.
Hence, you need to test it first for the best results.

For instance, with the retraction settings, the ideal values range from 2mm to 5mm.
In the testing process, you should begin with the 0mm retraction length.
After it creates the subpar models, check if it fits your needs.
If not, it gradually goes up the length by 0.5mm every time printing.
Stop the process when you have the highest quality.
To dial the retraction speed, you can do the same methods.
Begin with the rate of 10mm/s and raise the number by five mm/s each time.
After having the correct settings, the number of zits would decrease overall.
Let’s see this video to know more about how to fix the imperfections correctly:
2. Check printing temperature
The wrong temperature often occurs when you change into a new type of filament or another filament brand.
Hence, a double check is necessary.
Besides, the nozzle also plays a vital role in heat change.
For example, a brass nozzle has a higher thermal conductivity than the hardened steel one.
As a result, a decline in the nozzle temperature would help.
3. Reset printing speeds
Cause the constant change of printing speeds would make the zits, reset the number is my recommendation.
It would help if you defined the parameters to be similar in all parts of the process.
4. Reduce extrusion process (blobs)
With the over extrusion problem, the only method is to decline it.
You would see the coasting settings in the slicer software lying under the “Experimental” section on Cura.
Adjust the value so that the pressure in the extruder is relieved. Then, you should see no blobs existed.
5. Check extruder pathing (print)
Last but not least, you can solve the wrong extruder pathing by moving the layer’s start point with your hand.
Put it to a less exposed area like around the model’s back or a sharp edge.


However, once the method is not valid, take account of the “Compensate Wall Overlaps” setting in Cura. When the machine prioritizes the way flow adjustment, the setting will ignore the resolution value installed. Then, many 0.01 mm segments would appear, making ugly zits.
Once that is your case, use three settings: “Maximum Deviation,” “Maximum Resolution,” and “Maximum Travel Resolution.”
Opt for the “Expert” or “Custom Selection” view of Cura settings to enable them.
Then, set those three values at 0.075 mm, 0.5mm, and 0.5mm, respectively. Often, they are ideal numbers to remove the blobs.
How To Stop Zits 3D Printing On Nozzles?


When the nozzles contain zits, your prints would inevitably have blobs as well.
Hence, you need to remove the spots on nozzles.
First, try to adjust the acceleration and jerk settings, temperature, or retraction settings.
Increase the retraction speeds would cease the zits.
Plus, check the adhesion and first layer height. If they are incorrect, some parts like PETG materials can be stuck in the nozzles.
Moreover, before printing, clean the nozzles carefully to avoid residual substance, dust, or plastic.
Buying great nozzles also reduce the blemishes while printing, such as:
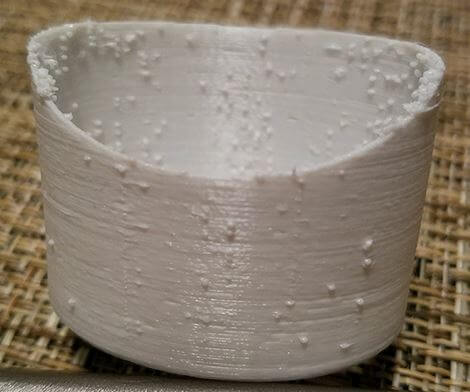
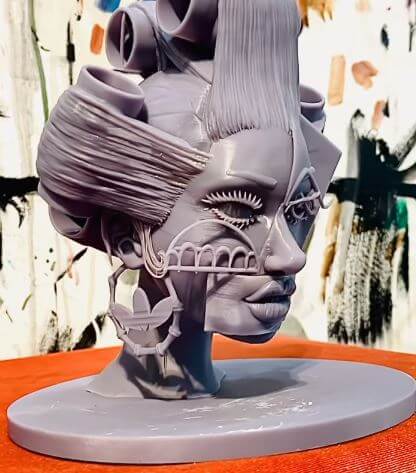
3D prints with imperfections (Source: stackexchange)
How To Get Rid Of Zits On 3D Prints (what are your voids?)
1. How to improve 3D print quality?
There are many ways to boost print quality.
Ensuring the nozzle height and the bed level are perfect is the first one.
After that, users can look for the sweet spot for the bed temperature.
Additionally, double-check the nozzle temperature, threads quality, printer maintenance, and adjustment.
Moreover, for some, using different build plates and support with overhangs gives them the best effects.
2. What are the suitable 3D printing speeds to avoid zits?
From 30mm to 90 mm per second is the ideal speed to run the 3D printers.
However, some manufacturers can utilize a lower level of pace to have better results.
But, if you are a newcomer, the mentioned range is my recommendation because several factors affect the speeds set up.

3. How to smooth out PLA?
Sandpaper is a standard method to smooth out the PLA threads.
Besides, the XTC-3D and 3D Gloop are great alternative methods.
Of course, although the PLA materials are often cheaper and more popular, they might not be as easy to be smoothed out as the ABS ones.
Hence, taking more time and energy to do that is inevitable.
4. How to fix ghosting 3D printing?
There are some ways to solve the ghosting problems in 3D print, including tightening the belts, using a solid base, and decreasing printing speeds.
For instance, when you have loose straps, chances are the vibrations increase, making ringing.
Hence, eliminate the vibrations is the main principle.
Conclusion
Above are a few pieces of information related to how to get rid of zits on 3D prints.
In a nutshell, users should adjust the print settings, temperature, and speeds. Plus, double-check the extruder pathing and decline the extrusion process would help alike.
Further Reading:
- Best Creality 3d Printer– How To Choose The Best One?
- Best Filament For Ender 3
- Top 6 Best 3D Printer For Cosplay Armor
- Best 3d Printer For Board Games
- Best Filament For Lithophanes: What To Use
- Top 7 Best Dual Extruder 3d Printer Under $500
Tags: bumps, go, getting, print quality guide, extruder starts printing, articles print quality, in-depth articles print, buyer guide basics, extra restart distance, blobs and zits, filament dry printing, print zits, solution, moves, read, feature, printed